Exos's build
-
Exos
- Consistent

- Posts: 280
- Joined: December 2nd, 2008, 1:35 pm
- Stroker Displacement: 4.7L
- Vehicle Year: 1998
- Vehicle Make: Jeep
- Vehicle Model: XJ
- Location: Quebec, Canada
Re: Exos's build
Well after about 4000 km, the engine is still stong, maybe even stronger. Sounds real good, except for the piston slap when cold. Oil pressure hasn't changed, coolant level either. I love it. I can now use my 5th gear, and even accelerate while on it, which was impossible before. This made me rethink about regearing.... I might just put a locker in the rear and forget about it.
-
Exos
- Consistent
- Posts: 280
- Joined: December 2nd, 2008, 1:35 pm
- Stroker Displacement: 4.7L
- Vehicle Year: 1998
- Vehicle Make: Jeep
- Vehicle Model: XJ
- Location: Quebec, Canada
Re: Exos's build
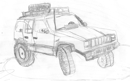
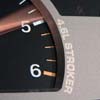
Some pics, some vids... in french. Enjoy.
-
Exos
- Consistent
- Posts: 280
- Joined: December 2nd, 2008, 1:35 pm
- Stroker Displacement: 4.7L
- Vehicle Year: 1998
- Vehicle Make: Jeep
- Vehicle Model: XJ
- Location: Quebec, Canada
-
Exos
- Consistent
- Posts: 280
- Joined: December 2nd, 2008, 1:35 pm
- Stroker Displacement: 4.7L
- Vehicle Year: 1998
- Vehicle Make: Jeep
- Vehicle Model: XJ
- Location: Quebec, Canada
-
Muad'Dib

- Site Admin / Owner

- Posts: 1516
- Joined: January 8th, 2008, 10:55 am
- Stroker Displacement: 4.7L
- Vehicle Year: 1990
- Vehicle Make: Jeep
- Vehicle Model: Cherokee
- Location: Oregon
- Contact:
Re: Exos's build
I guess no updates = good??? How is your stroker?
If it feels right, then STROKE it!
-
Tinga
- Making Progress

- Posts: 64
- Joined: November 12th, 2010, 5:01 pm
- Vehicle Year: 2002
- Vehicle Make: Jeep
- Vehicle Model: TJ
- Location: Oregon
Re: Exos's build
Did you end up having to use a valve cover spacer? In the video it looks like a stock Valve cover
-
Exos
- Consistent
- Posts: 280
- Joined: December 2nd, 2008, 1:35 pm
- Stroker Displacement: 4.7L
- Vehicle Year: 1998
- Vehicle Make: Jeep
- Vehicle Model: XJ
- Location: Quebec, Canada
 Re: Exos's build
Everything still A1, after 20 000 km. Torque and power still up there, might even be a little more now. Oil pressure hasn't changed one psiMuad'Dib wrote:I guess no updates = good??? How is your stroker?
I only have 2 issues : The valve cover is leaking a little, even after I resealed it. It has the Hesco spacer under it. I might try and permanently seal the cover to the spacer with epoxy or something.
Secondly, I think I may have put the wrong pilot bearing in the crank... and it rattles sometimes. I'm not 100% sure, but I remember it felt loose when I intalled it. I already have a new cluth kit and the correct bearing, but did not have time to intall it yet.
I did other upgrades to the XJ too. I now have an Aussie locker in the rear 8.25, I installed an Addco swaybar (best buy ever), installed a JKS steering box brace system and their quicker discos... and I just ordered a Detours Usa backbone bumper system.
-
SilverXJ
- Global Moderator

- Posts: 5790
- Joined: February 14th, 2008, 7:14 am
- Stroker Displacement: 4.6L
- Vehicle Year: 2000
- Vehicle Make: Jeep
- Vehicle Model: Cherokee
- Location: Radford, Va
Re: Exos's build
What sealant are you using on the bottom of the hesco spacer now?
I definitely like the detours tail bone. And Addcos are definitely a good improvement. I have one waiting for the rear on mine but I ..umm... have to get it running first. One of the first things I did on my mom's WJ was install front and rear Addcos... that was a greater improvement in my XJ... night and day difference in handling on the WJ. I am pretty sure the WJ stock bars were hollow. Handling was just pitiful prior.
I definitely like the detours tail bone. And Addcos are definitely a good improvement. I have one waiting for the rear on mine but I ..umm... have to get it running first. One of the first things I did on my mom's WJ was install front and rear Addcos... that was a greater improvement in my XJ... night and day difference in handling on the WJ. I am pretty sure the WJ stock bars were hollow. Handling was just pitiful prior.
2000 XJ. 4.6L stroker
00+ Viper Coil Swap | CPS Timing Increase Mod | Fabricated Airbox | Dash bezel, Arduino Multigauge & RD Conceal
Eat, breath, drink, sleep, Jeep, drink
00+ Viper Coil Swap | CPS Timing Increase Mod | Fabricated Airbox | Dash bezel, Arduino Multigauge & RD Conceal
Eat, breath, drink, sleep, Jeep, drink
-
Exos
- Consistent
- Posts: 280
- Joined: December 2nd, 2008, 1:35 pm
- Stroker Displacement: 4.7L
- Vehicle Year: 1998
- Vehicle Make: Jeep
- Vehicle Model: XJ
- Location: Quebec, Canada
Re: Exos's build
I'm using blue RTV, Permatex, both between the cover and spacer, and on the bottom of spacer. Not sure where it leaks.SilverXJ wrote:What sealant are you using on the bottom of the hesco spacer now?
-
SilverXJ
- Global Moderator
- Posts: 5790
- Joined: February 14th, 2008, 7:14 am
- Stroker Displacement: 4.6L
- Vehicle Year: 2000
- Vehicle Make: Jeep
- Vehicle Model: Cherokee
- Location: Radford, Va
Re: Exos's build
There is problem.
Don't use blue. I wouldn't use blue for anything. I feel that grey or The Right Stuff is the best. Hesco recommends using anaerobic selant. Napa should have it in a blue tube. It dries hard when it is cut off from air. That way the excess that oozes out won't get hard and possible clog the oil pickup and other nasty stuff. I guess its fool proof. If you don't want to use the anaerobic I would use either grey or The Great Stuff. With the great stuff you will have some work to do if you want to remove it later.
Now, that is only for the sealing surface between the head and spacer. For between the valve cover and spacer just use the stock gasket. You have a 97+ so I would assume you have the stamped steel valve cover. The gasket for that is very good, seals well and is reusable.
Also, when using the sealant make sure everything is as clean as possible... you will have to get to the very back of the head and clean that well. I recommend the repair be done after it sat over night so all the oil can grain off the head.
2000 XJ. 4.6L stroker
00+ Viper Coil Swap | CPS Timing Increase Mod | Fabricated Airbox | Dash bezel, Arduino Multigauge & RD Conceal
Eat, breath, drink, sleep, Jeep, drink
00+ Viper Coil Swap | CPS Timing Increase Mod | Fabricated Airbox | Dash bezel, Arduino Multigauge & RD Conceal
Eat, breath, drink, sleep, Jeep, drink
-
Exos
- Consistent
- Posts: 280
- Joined: December 2nd, 2008, 1:35 pm
- Stroker Displacement: 4.7L
- Vehicle Year: 1998
- Vehicle Make: Jeep
- Vehicle Model: XJ
- Location: Quebec, Canada
Re: Exos's build
I think I figured out a way to patch the leaking valve cover. Firt, I realized that the spacer and '98 valve cover don't work well together, because of the grommets. I did not realize that at first. You see, the grrommets have to go in first, then the washers/bushing things. When I fist did it, I put the grommets/washers after sealing the valve cover and spacer. The grommets put a space between the cover and spacer. What you need to do is :
-Clean everything with MEK or degreaser and alcool
-put the grommets in the valve cover, then the washer/budhings
-put a bead of rtv sealeant on the valve cover
-lay the spacer on the valve cover, and use the bolts and use some 1/4-20 nuts to hold them together, fingerthight. Lay a bead of rtv on the outside and inside edges of the cover/spacer, as you would do for sealing a bath.
-wait an hour
-remove the nuts and bolts
-use an OEM '98 gasket between spacer and head. ( I had to modify mine because of the Chevy small block ARP studs I'm using for the head.... I had to cut the steel braces of the gasket)
-Lay the cover/spacer on the head, and torque the bolts to 85 inch/pound
-
SilverXJ
- Global Moderator
- Posts: 5790
- Joined: February 14th, 2008, 7:14 am
- Stroker Displacement: 4.6L
- Vehicle Year: 2000
- Vehicle Make: Jeep
- Vehicle Model: Cherokee
- Location: Radford, Va
Re: Exos's build
Yeah, you did it wrong. The gasket goes between the spacer and the cover, like stock w/no RTV. Only RTV/anaerobic sealant between the head and spacer. See my previous post.
2000 XJ. 4.6L stroker
00+ Viper Coil Swap | CPS Timing Increase Mod | Fabricated Airbox | Dash bezel, Arduino Multigauge & RD Conceal
Eat, breath, drink, sleep, Jeep, drink
00+ Viper Coil Swap | CPS Timing Increase Mod | Fabricated Airbox | Dash bezel, Arduino Multigauge & RD Conceal
Eat, breath, drink, sleep, Jeep, drink
-
Exos
- Consistent
- Posts: 280
- Joined: December 2nd, 2008, 1:35 pm
- Stroker Displacement: 4.7L
- Vehicle Year: 1998
- Vehicle Make: Jeep
- Vehicle Model: XJ
- Location: Quebec, Canada
Re: Exos's build
that sitll would not work without modifyng the oem gasket.... I'm pretty sure the way I did it will work fine. I'll tell you in a few miles. How can you say I did it "wrong"?? ..............there's no right or wrong here, only leak-free way to do it.
-
SilverXJ
- Global Moderator
- Posts: 5790
- Joined: February 14th, 2008, 7:14 am
- Stroker Displacement: 4.6L
- Vehicle Year: 2000
- Vehicle Make: Jeep
- Vehicle Model: Cherokee
- Location: Radford, Va
Re: Exos's build
You don't have to mode the OEM gasket in anyway. Its wrong because form the sounds of it you just gobbed RTV on, like in a bath tub. When the correct procedure is easier, faster, and cleaner. And you had the correct instructions right there. 
2000 XJ. 4.6L stroker
00+ Viper Coil Swap | CPS Timing Increase Mod | Fabricated Airbox | Dash bezel, Arduino Multigauge & RD Conceal
Eat, breath, drink, sleep, Jeep, drink
00+ Viper Coil Swap | CPS Timing Increase Mod | Fabricated Airbox | Dash bezel, Arduino Multigauge & RD Conceal
Eat, breath, drink, sleep, Jeep, drink
-
Exos
- Consistent
- Posts: 280
- Joined: December 2nd, 2008, 1:35 pm
- Stroker Displacement: 4.7L
- Vehicle Year: 1998
- Vehicle Make: Jeep
- Vehicle Model: XJ
- Location: Quebec, Canada
Re: Exos's build
What correct instructions? Because you wrote it means it's correct???? It doesn't leak, so I'm happy.
And yes, in my case, the oem gasket needs to be modified, because of the studs.
And yes, in my case, the oem gasket needs to be modified, because of the studs.
Who is online
Users browsing this forum: No registered users and 1 guest