Mikey's Stroker build

Project vehicle blogs or "mod diary" specific threads only.. Pics encouraged!!
Post Reply
User avatar
Mgardiner1
Donator
Donator
Posts: 574
Joined: August 2nd, 2008, 6:19 pm
Stroker Displacement: 284 CI
Location: Wading River, NY

Mikey's Stroker build

Post by Mgardiner1 »

First off and foremost, I'd really like to thank everybody on this board who have contributed to the invaluable data and information listed. I'm glad to be a part of it!

Special thanks to:
Oletshot: for helping me dish my pistons to 20 CC
dwg86: for making ends meet on my quest for a Mopar 30AB camshaft
Gradon: for a great price on a set 8 degree mopar valve keepers
Boilermaker: for a little FSM help

Mikey's stroker:
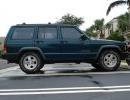
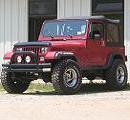
There are many reasons why i'm building this stroker. My jeep came to me with a 4.2, weber carburetor'd, oil burning, TF999 automatic, with almost low profile, wide tires on it. I began shortly with its "face lift". Jacked it up 4 inches, installed 33's, swapped carb for fuel injection, and installed an AX15.
2 years ago, i acquired a Renix injection cherokee, and went full steam ahead on an engine swap. The cherokee had 203K miles on it. At the time of the swap, i pulled the oil pan to reseal it. I took a peak under one of the main caps, and was not all that surprised to see all sorts of scores and grooves on the journals. Having absolutely no money to put into a rebuild, i reassembled it and stuck it in.
The engine has seen better days. It has a horrible rattle/knock during startup until it builds oil pressure. In upper RPM ranges under no load, it rattles and knocks some more. You get the point.

So, this summer i acquired another cherokee (these things are a dime a dozen!!), first year of the HO. And so we begin.....

List of parts:
4.0 liter block/cyl head/intake manifold (91 cherokee)
4.2 liter crankshaft (original engine)
4.2 liter connecting rods (ebay (i threw the original ones away because i gave up the idea of doing the stroker at one point)
Mopar Cam+lifters 4529230AB (Thanks dwg86)
Pistons - Speed Pro Hypereutectic - H802CP +.060 (summit)
Metric Speed Pro +.060 Piston Rings (summit)
ARP connecting rod bolts -112-6001 (summit)
Engine assembly lube (summit)
Water Pump - High volume - 110-1080P (summit)
Oil Pump - Standard Volume - M81A (summit)
GM EOS (Break in oil additive) (4 bottle off of ebay)
"Stock" Head Gasket (quadratec)
Exhaust manifold/header (automotive parts network)
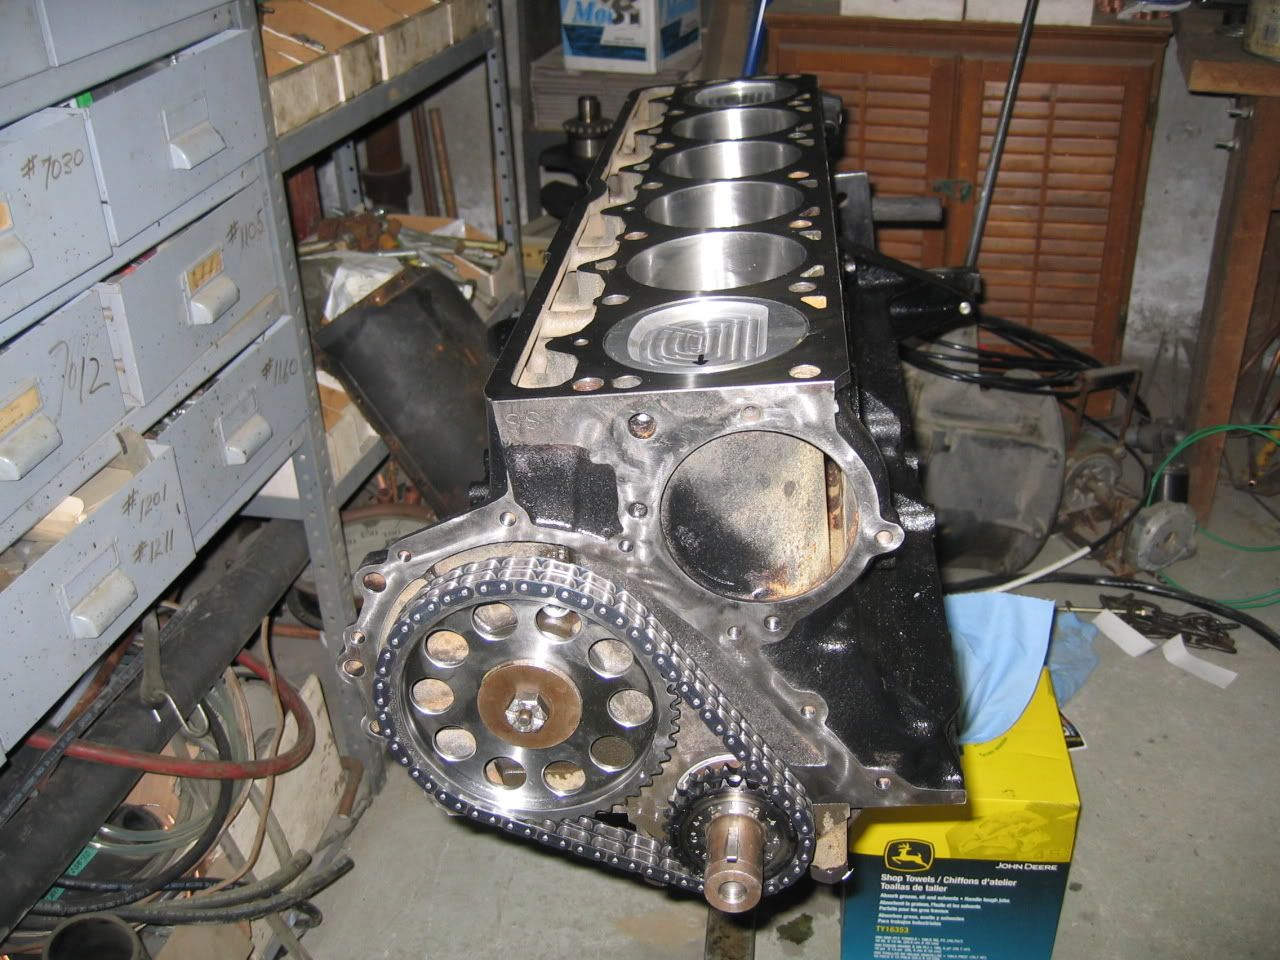
Double roller timing set (ebay)
Ford 24 lbs/hr injectors (contact off of ebay)
Mopar Mag valve springs - P5249464 (advance auto)
Mopar Spring retainers - P4452032 (summit)
Mopar valve keepers - P4529218 (Thanks gradon)
Head Bolts - CHBS-1128 (headbolts.com)
Main cap bolts (moparpartsamerica.com
Gaskets: (less head and manifold gasket) - (advance auto)
Distributor cap (advance auto)
Ignition Rotor (advance auto)
Spark plug wire set (advance auto)
Spark plugs (x6) (advance auto))
Oil Filter (advance auto)
Serpentine belt (advance auto)
POR-20 high temp paint & solvent (manifold) (por15.com)
Standard Abrasives head porting kit (summit)
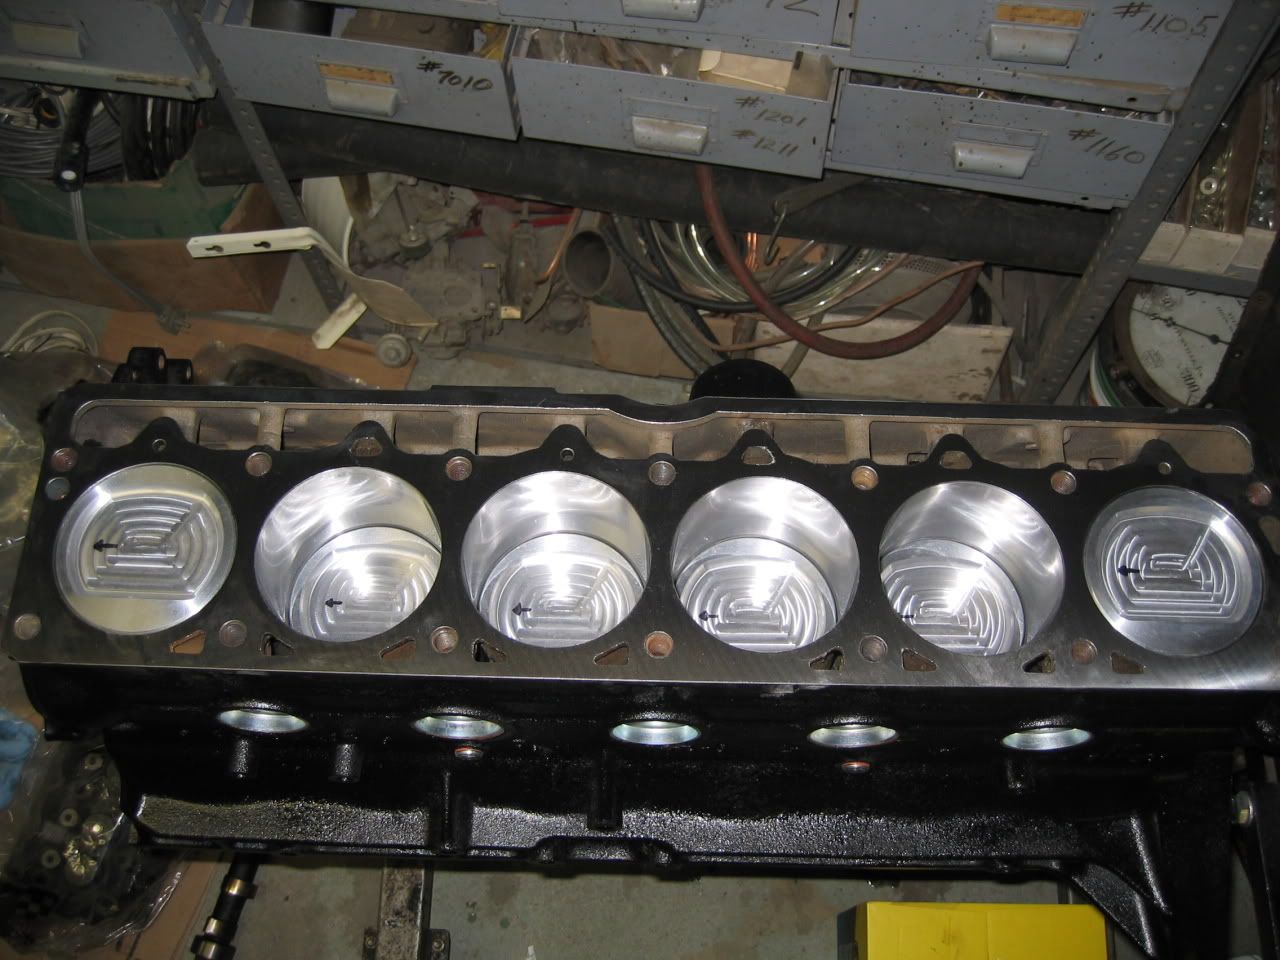
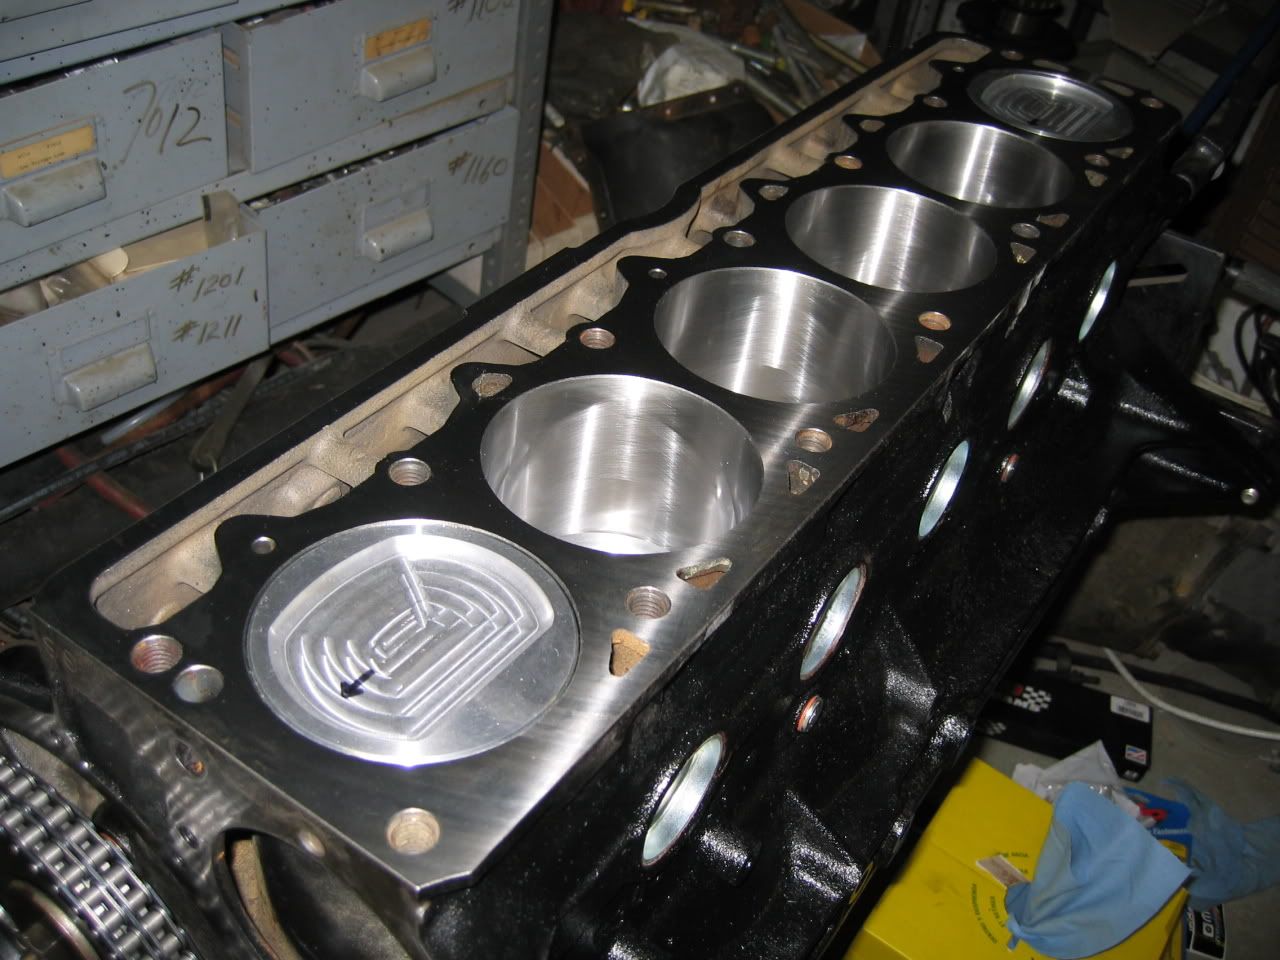
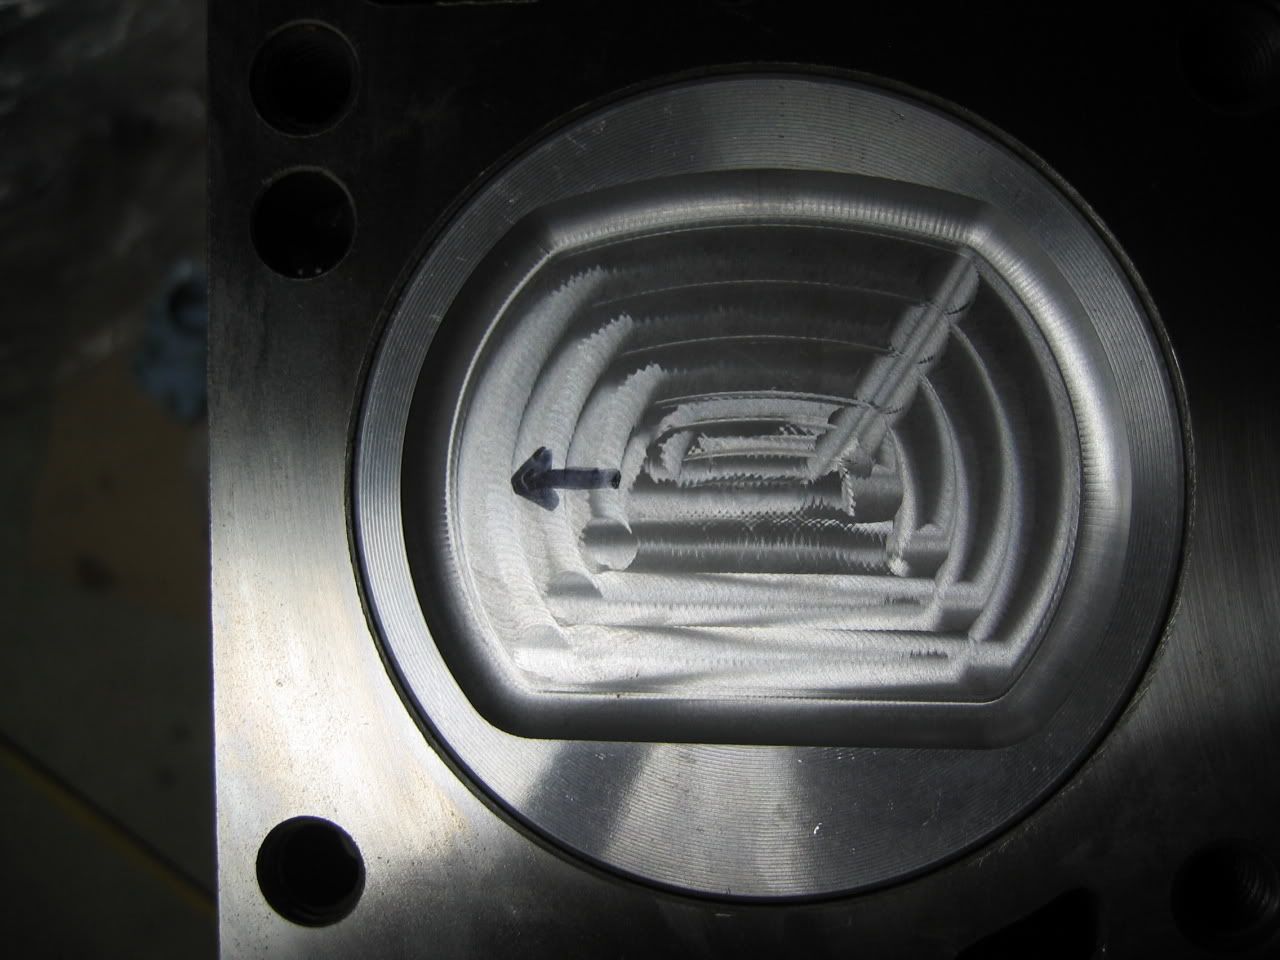
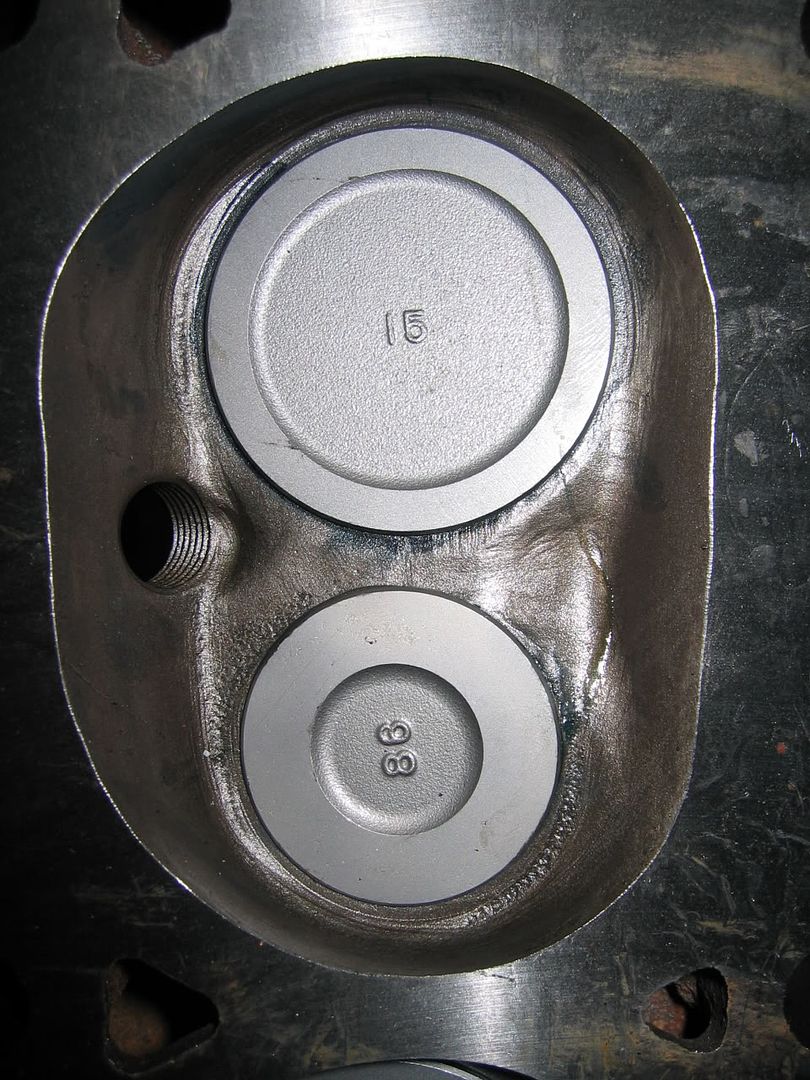
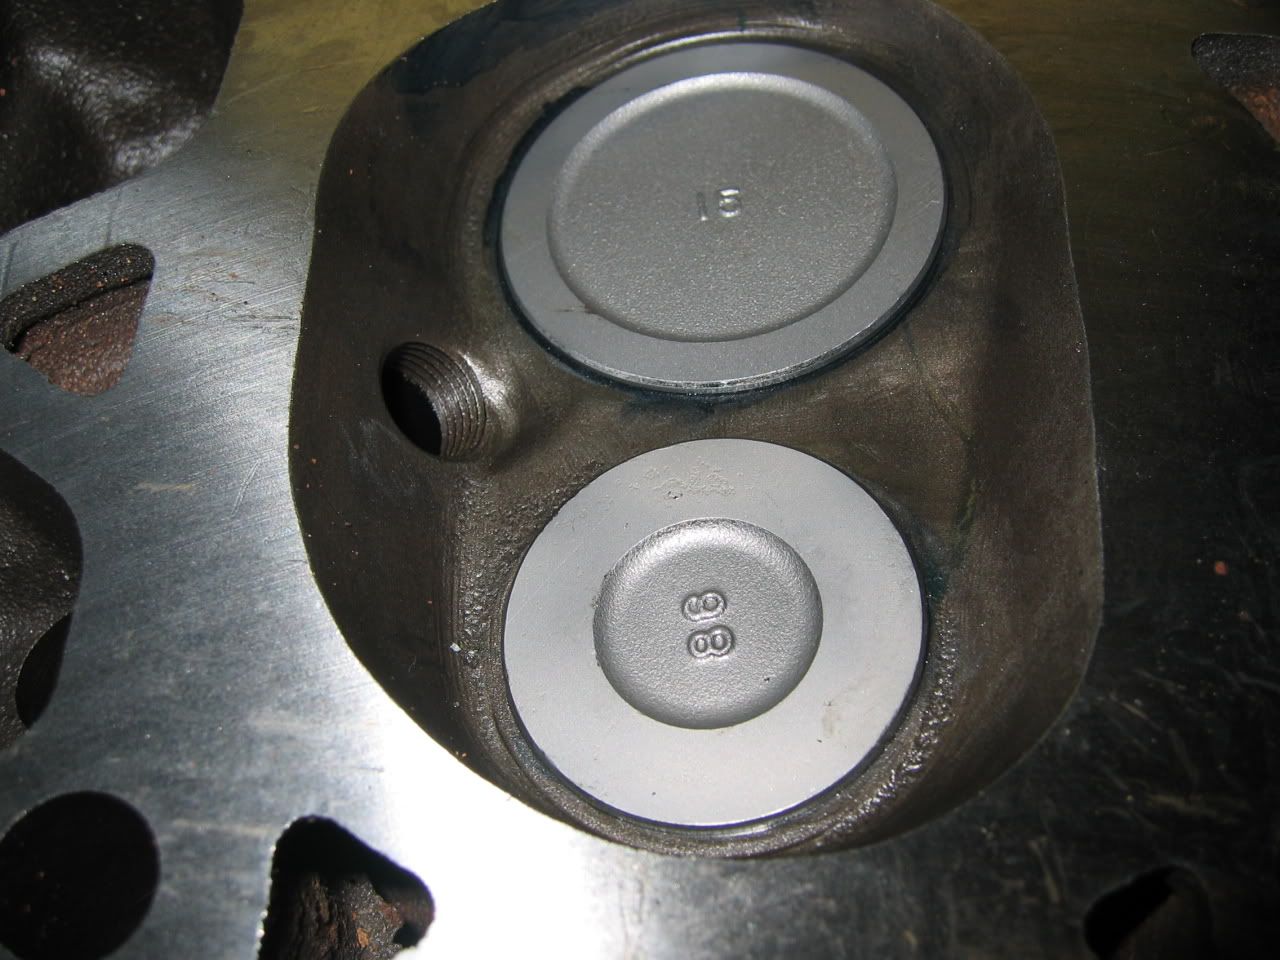
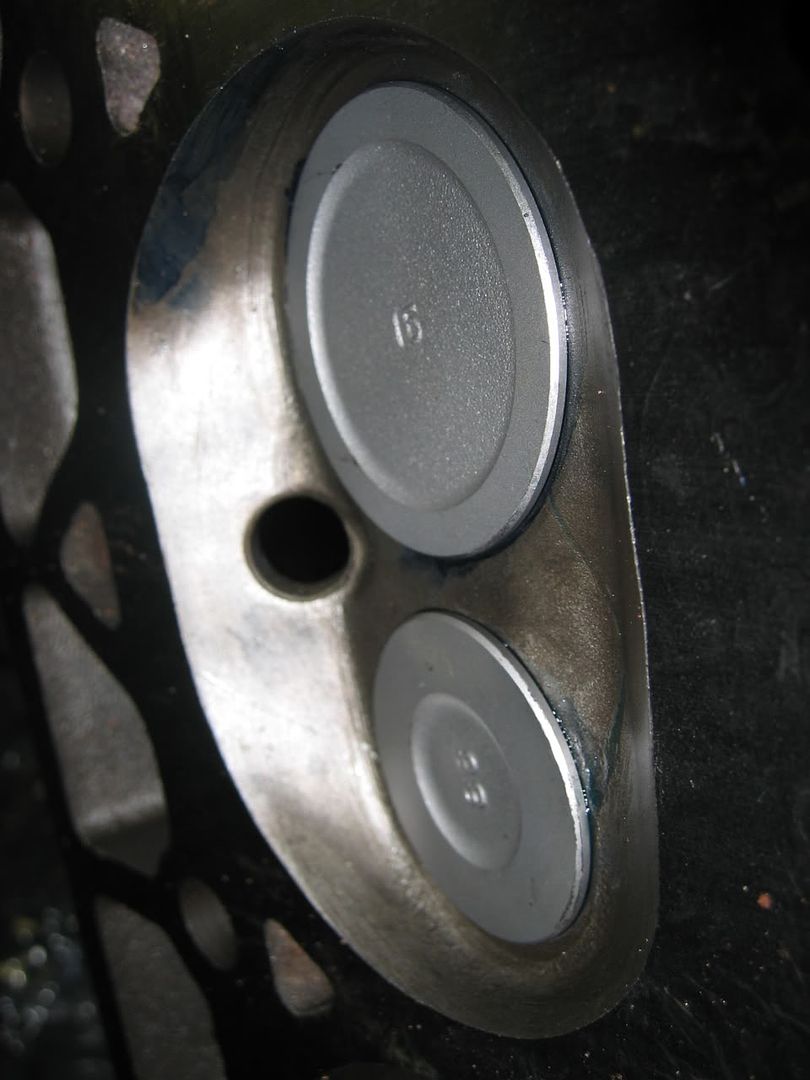
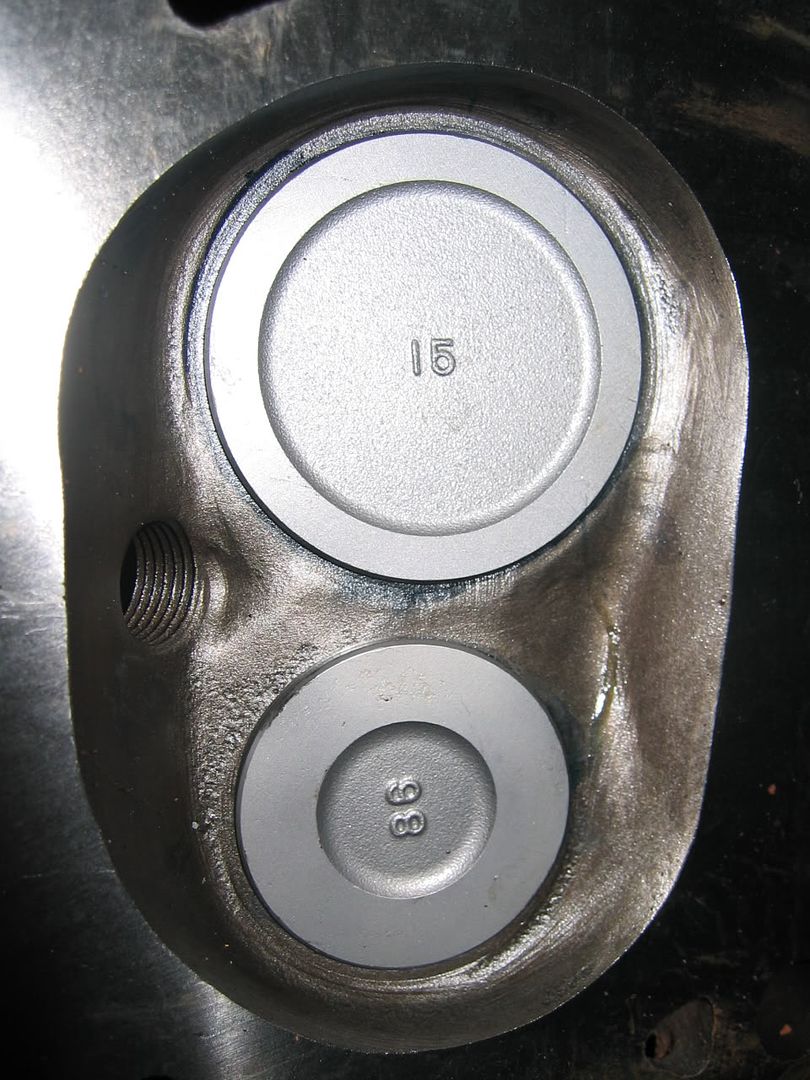
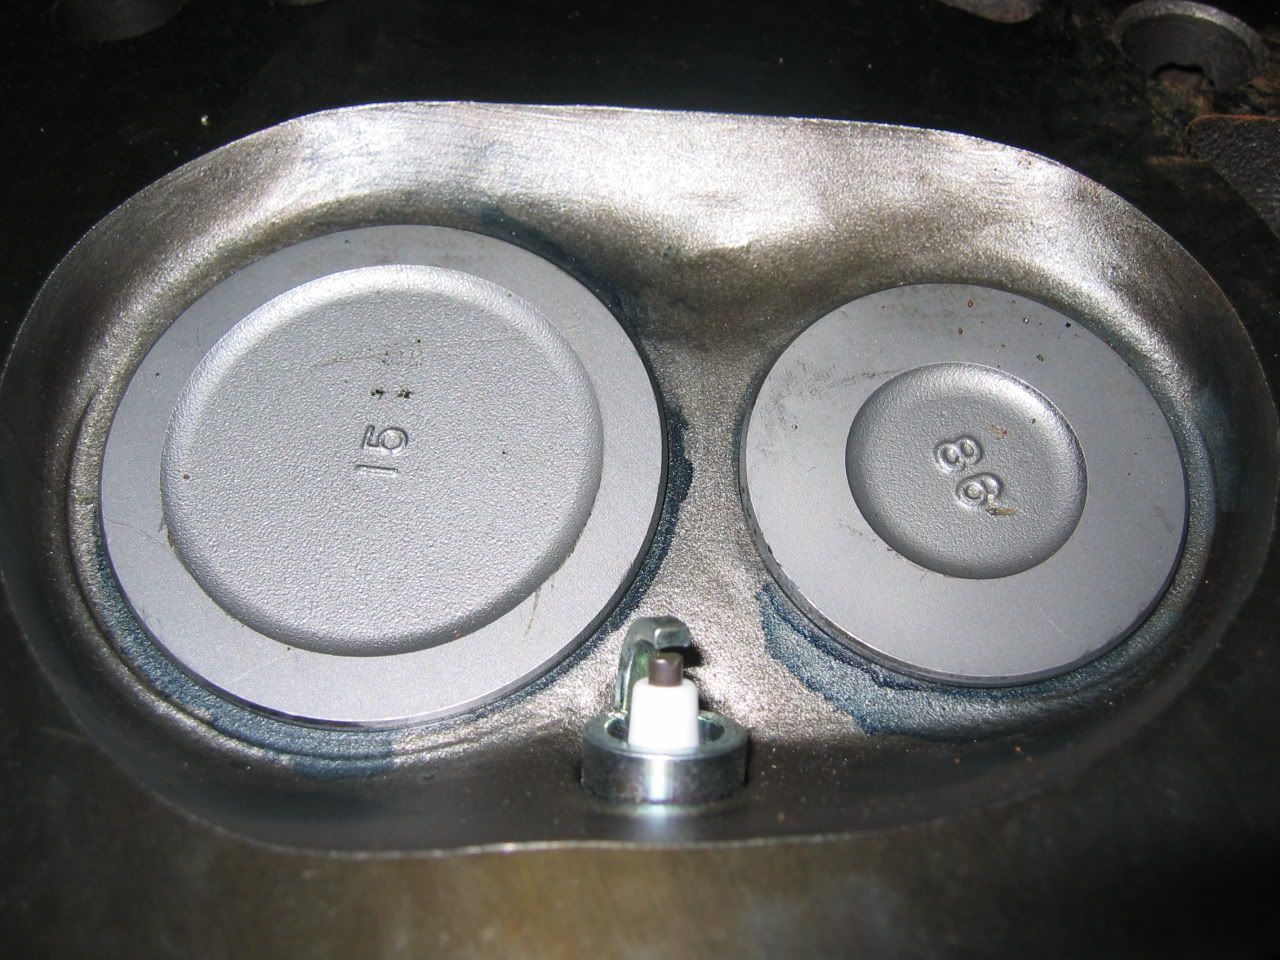
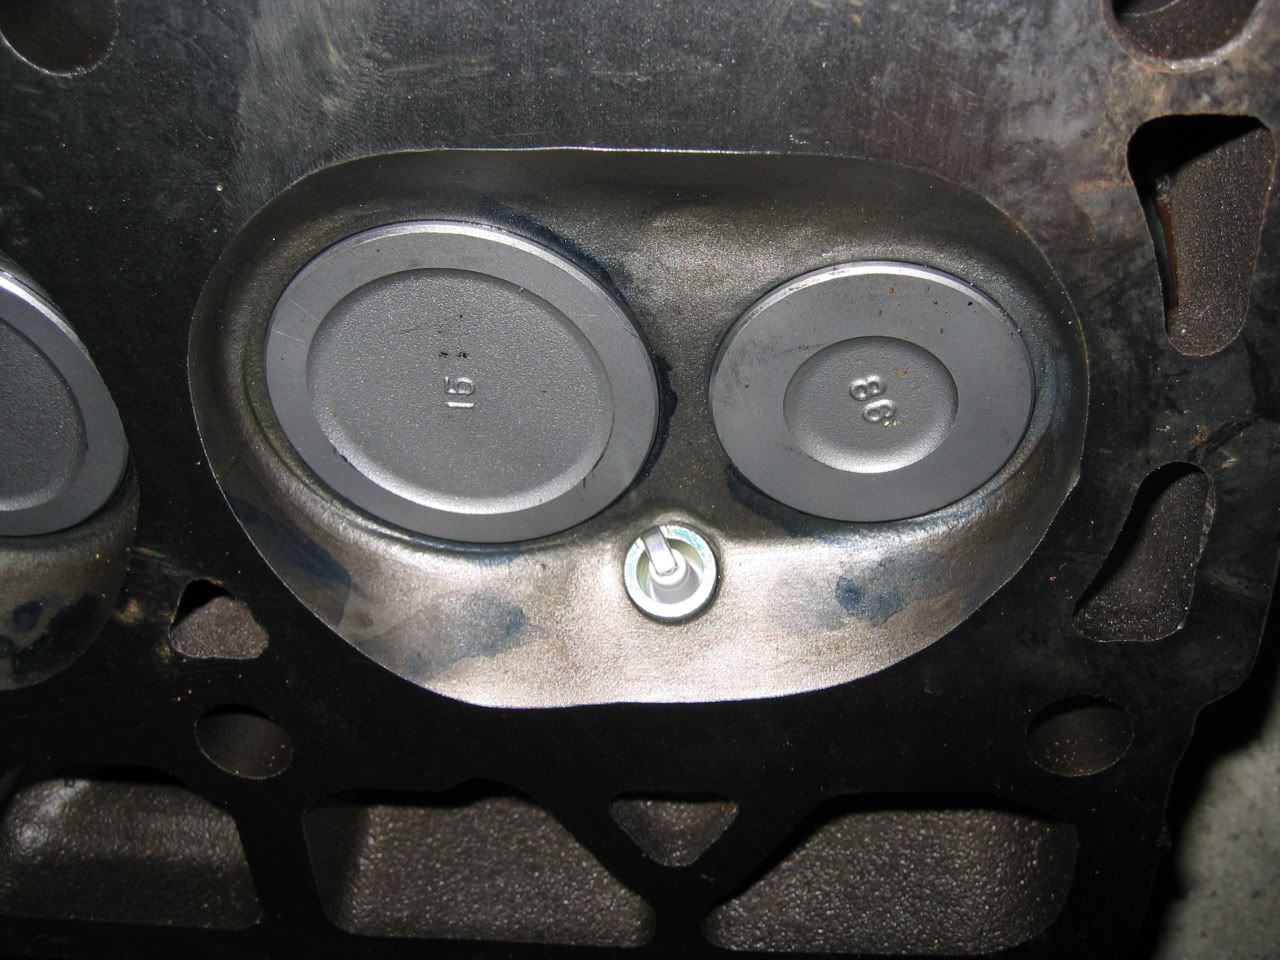
Piston Dishing (Thanks oletshot)
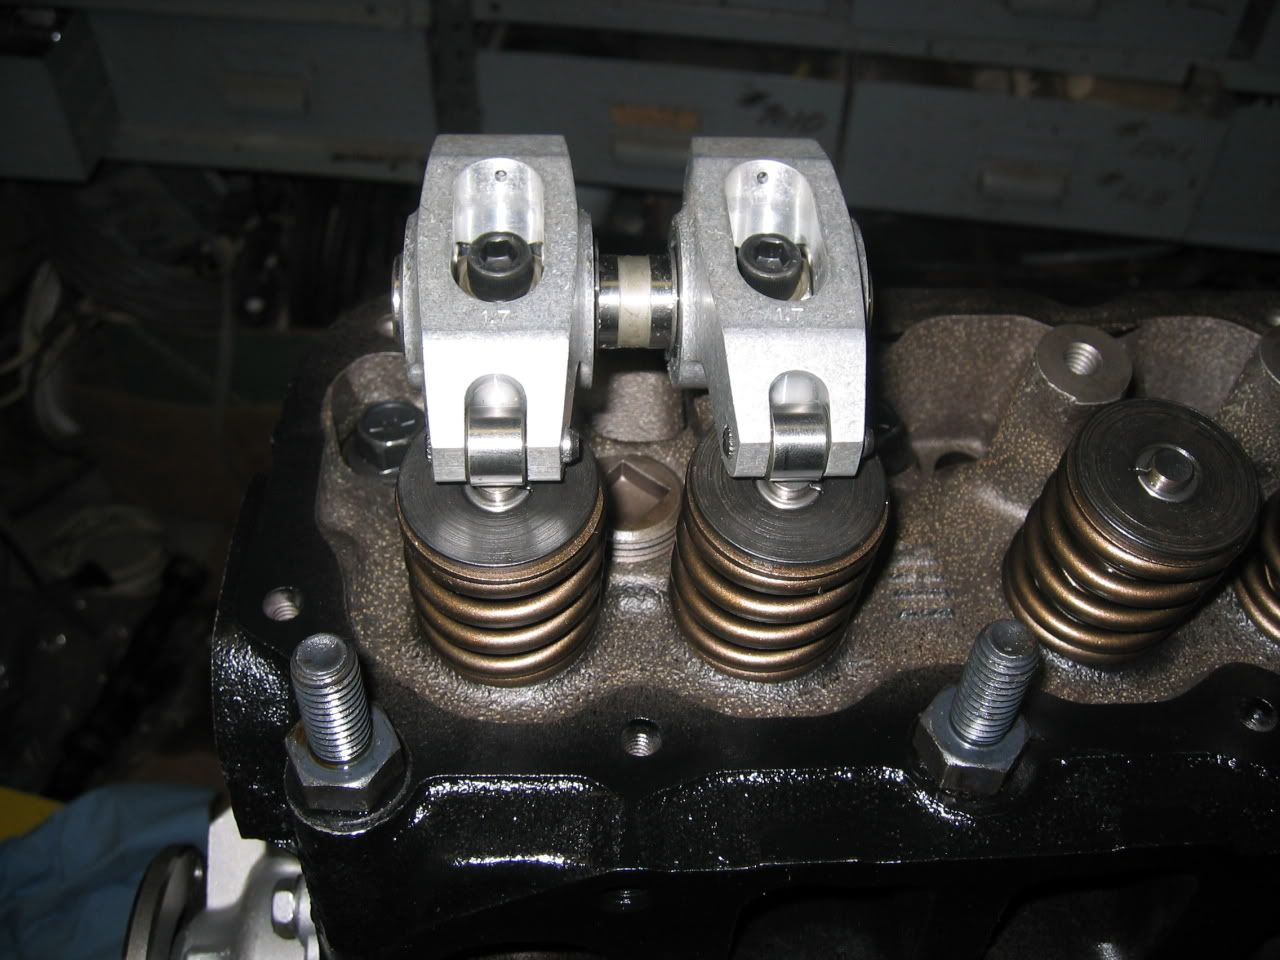
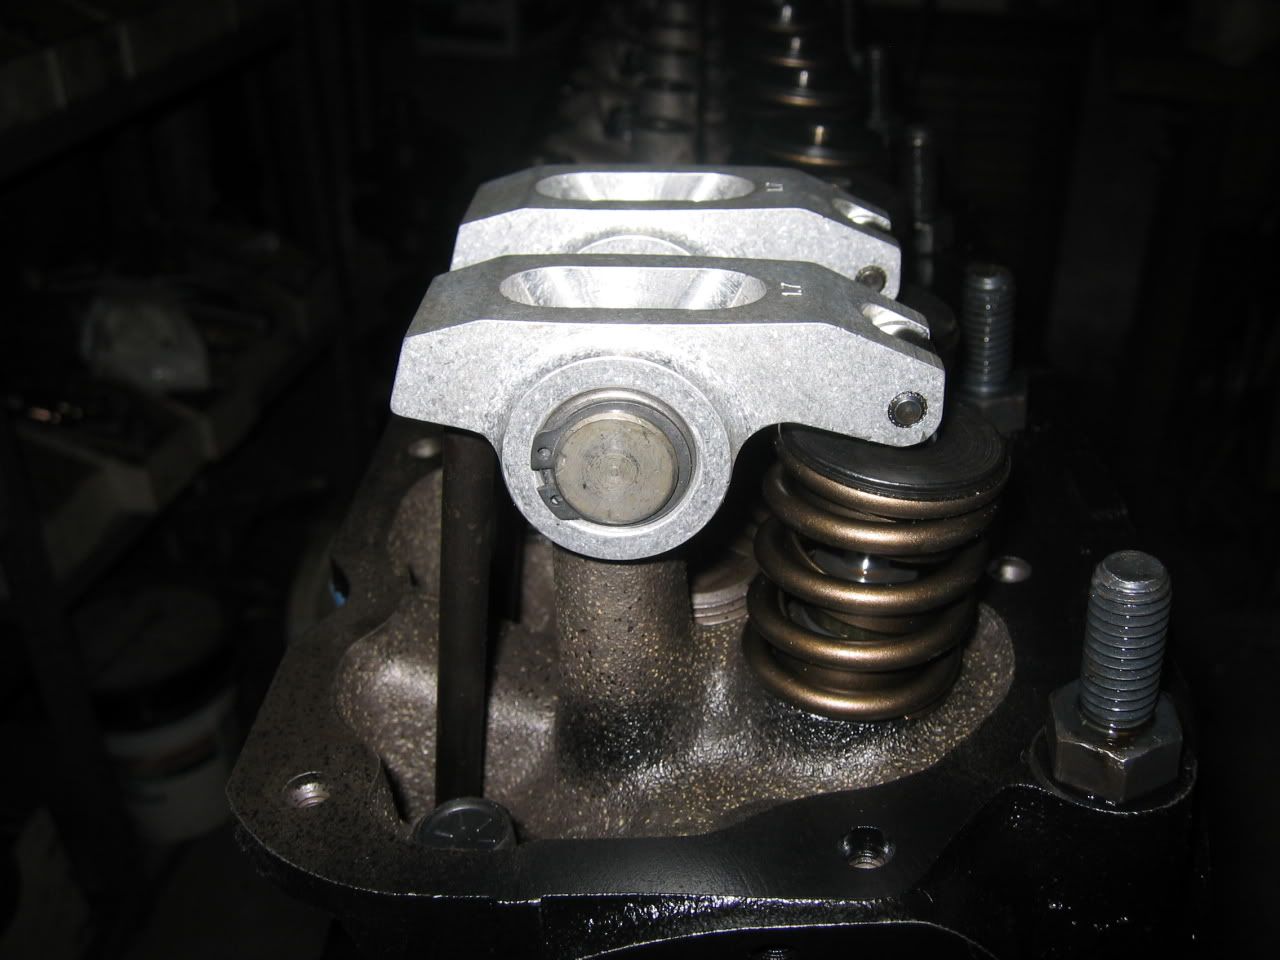
Yella Terra 1.7 Roller Rockers (ebay)
Bolt on 3" exhaust collector (jegs)
3" Catalytic converter (jegs)
99+ "Improved" intake manifold (ebay)
Centerforce 2 clutch (quadratec)
Clevite 77 Main bearings (hesco)
Clevite 77 Cam bearings (hesco)
Clevite 77 Rod bearings (hesco)
All machine shop labor (Ace Crankshaft)
DIY port and polish job
Machine shop work consisted of: Bore, Hone, Deck block. Skim head for flatness. 3 angle valve grind. Grind and reuse oem valves. Installed new stem seals and MP valve springs, retainers, and keepers. Grind and polish crank. Weight match all piston/rod assemblies. Balance crankshaft.

I don't know if this would be considered a medium, or high buck stroker. I've exceeded my "budget" by $1000 so far. The clutch was not expected, it only has maybe 4,000 miles on the one thats in it. That will teach me to buy the cheapest $100 pressure plate/disc assembly again.... I wasn't going to add on the roller rockers, mainly because of cost. After seeing how worn the OEM's were, i had to do something. I didn't want to put money into another set of "stock" or improved stock rockers, when a little extra dough would get me what i REALLY wanted. The 3" header-to-tailpipe exhaust was not something i planned either. I saw (can't remember members name) the thread on here where the member lobbed off the 2.25 header collector and welded on a 3". I liked that idea, and decided to hop on the bus. I'm still toying with the idea of having a single inlet/dual outlet muffler, and put dual tailpipes out the back.

I'm working with these numbers: 3.935 bore, .002 deck height, 20cc piston dish, .051 head gasket (.053 quench). 9.54 SCR, 8.25 DCR. The mopar 30AB cam has an IVC of 54. My original plan was to retard the timing 2-4 deg via adjustable crank timing sprocket (to lower the DCR), but i chickened out and left it at 0. I'd rather use the next grade gas then loose some bottom end torque.

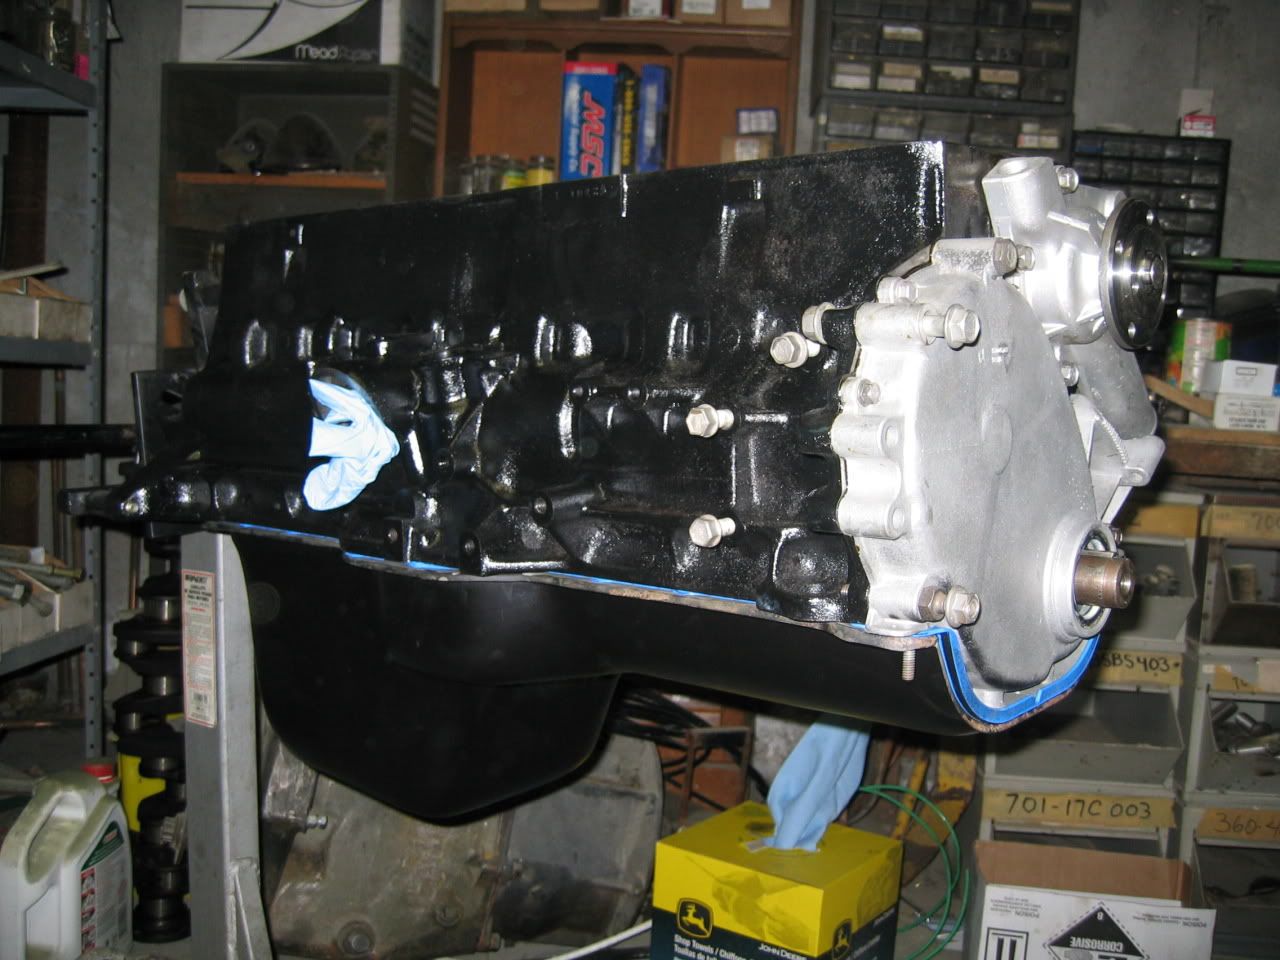
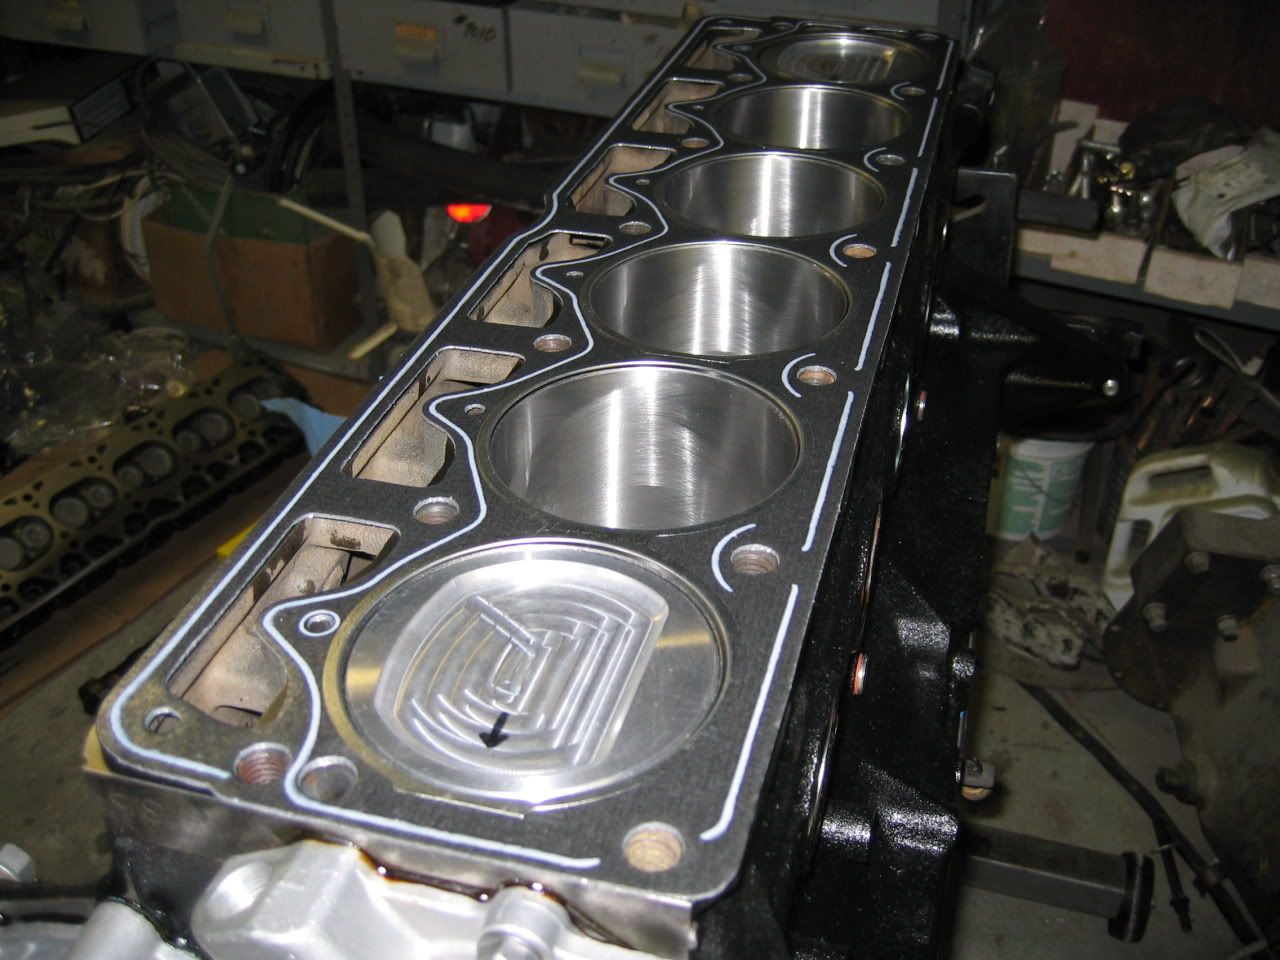
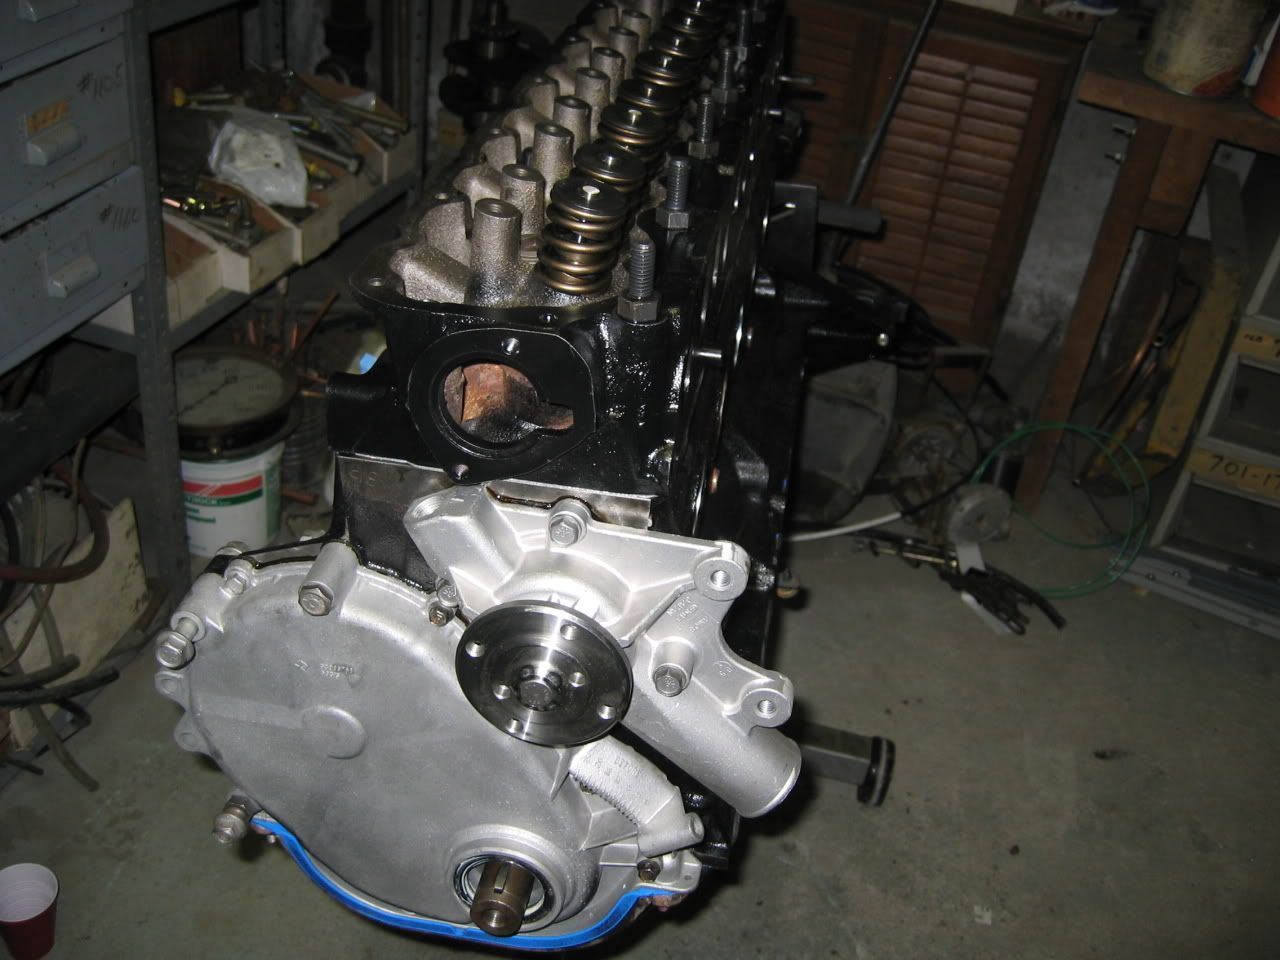
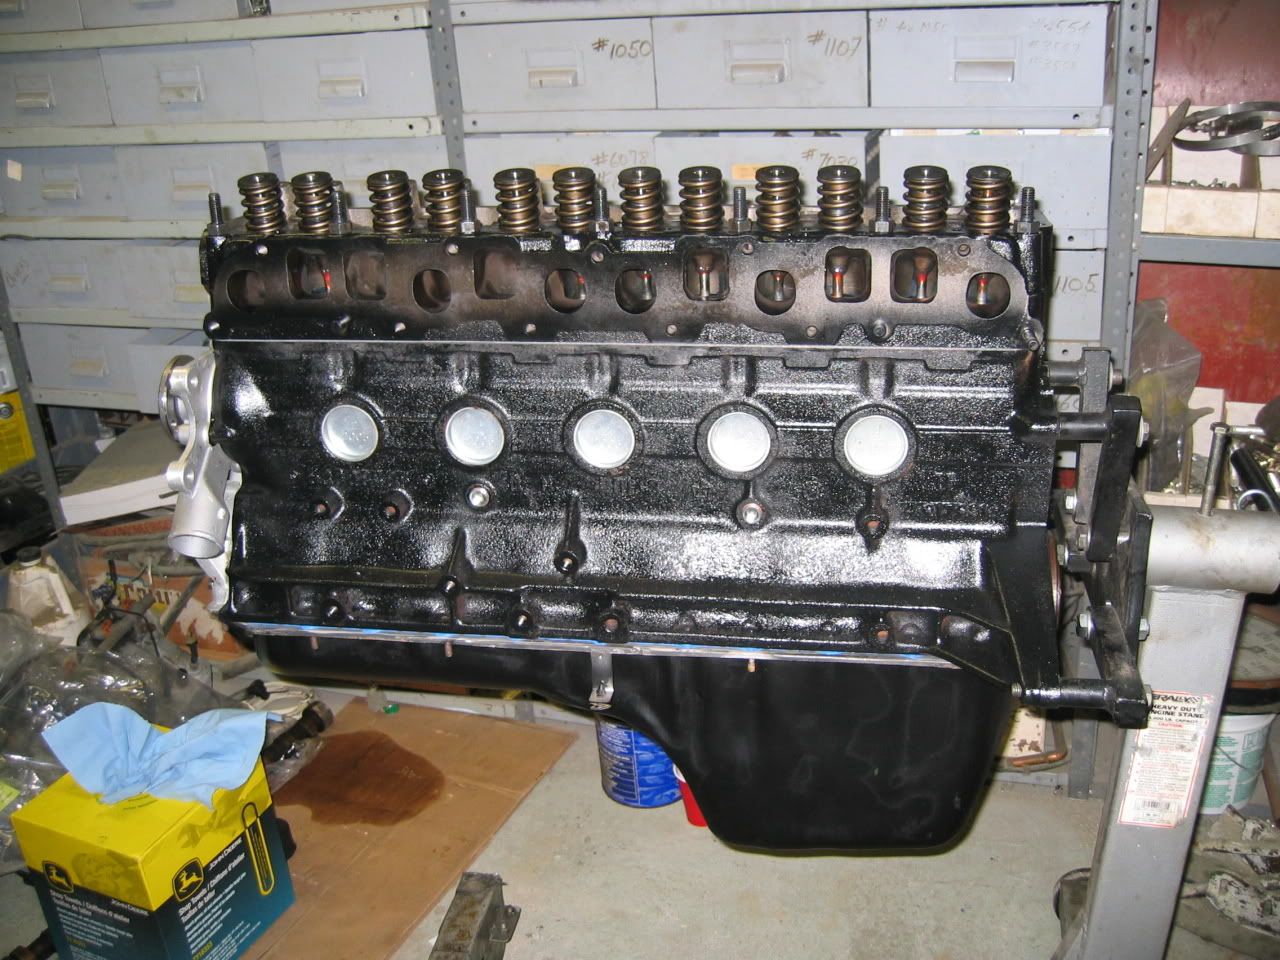
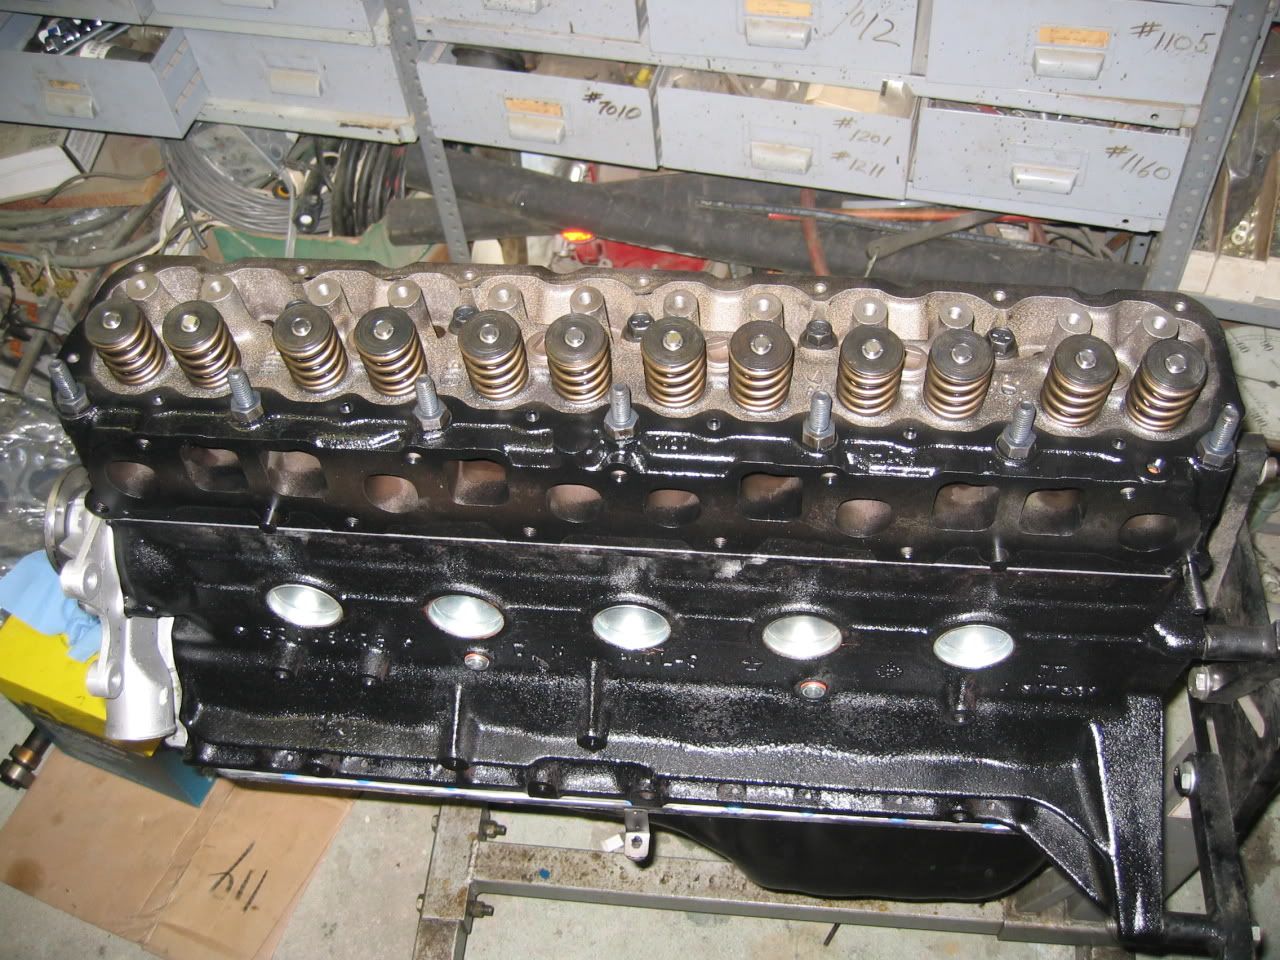
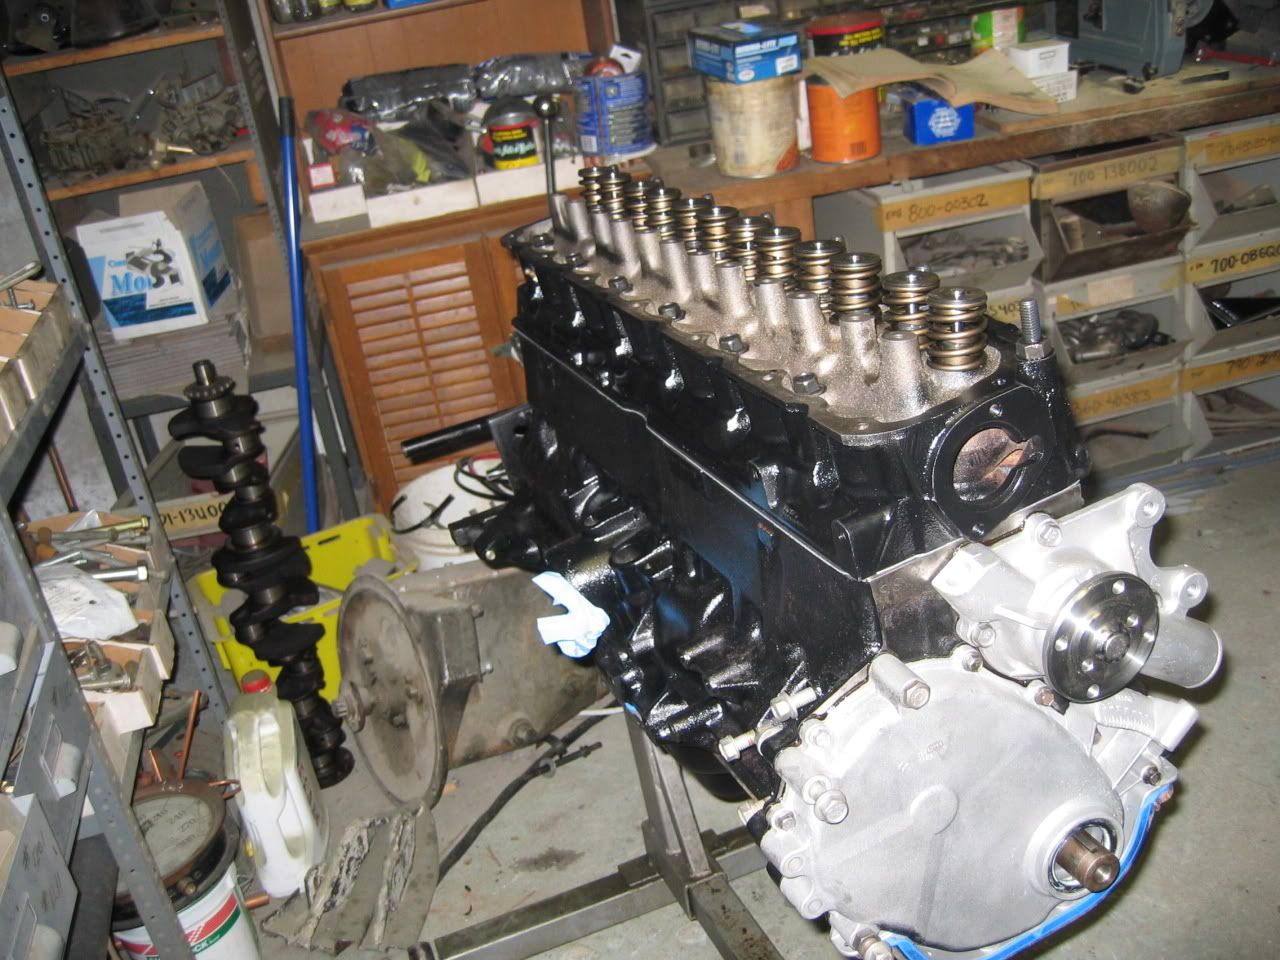
I just started assembly today. I cleaned everything up and blew out all oil passages. I pressed in the new cam bearings (thanks for the heads up on sizes dwg86 :) ), lubed up the cam, and slid it in. Had a nice snug feel, just beyond rotating it with my hand, but am able to rotate it by hand with the drive sprocket on it. Even though i trust the machine shop, i plastigauged the mains, and all 7 were dead nuts on .002 (the "preferred" clearance in the book). I removed and cleaned up the crank, used a combination of a thin layer of comp cams ENGINE assembly lube, and drizzled some GM EOS in the crank oil holes. After torqueing the mains, the crank was nice and easy to spin by hand, only resistance was from the assembly grease.
Then i ringed the pistons and got ready to drop them in. This is where i was forced to come accross my "Hybrid" bearing problem. 2 out of 6 rod bearings had the oil slinger holes in them (Brazil bearings), and the other 4 (USA bearings) did not. So i carefully used my dremal and created my own notches, which seemed to work out very well in terms of alignment and size. I left tonight off after torqueing all the rods, and installing the timing chain assembly (0 degree adv/ret).


Here are a few pictures of my progress

Image

Image

Image

Image
oletshot wrote:....and silvolites are only cast not hypericantspellits. :-)
dwg86
Donator
Donator
Posts: 1201
Joined: February 13th, 2008, 6:20 pm
Stroker Displacement: 4.6
Vehicle Year: 2003
Vehicle Make: Jeep
Vehicle Model: Wrangler
Location: Atlanta, Ga

Re: Mikey's Stroker build

Post by dwg86 »

Looking good :cheers: . How much did the piston dishing cost?
User avatar
Mgardiner1
Donator
Donator
Posts: 574
Joined: August 2nd, 2008, 6:19 pm
Stroker Displacement: 284 CI
Location: Wading River, NY

Re: Mikey's Stroker build

Post by Mgardiner1 »

I'm not sure if Oletshot's prices are standard, or piston/request dependent. He charged me $70 to do mine
oletshot wrote:....and silvolites are only cast not hypericantspellits. :-)
dwg86
Donator
Donator
Posts: 1201
Joined: February 13th, 2008, 6:20 pm
Stroker Displacement: 4.6
Vehicle Year: 2003
Vehicle Make: Jeep
Vehicle Model: Wrangler
Location: Atlanta, Ga

Re: Mikey's Stroker build

Post by dwg86 »

Well they look good. I'll have to shoot him a PM.
Thanks
User avatar
Mgardiner1
Donator
Donator
Posts: 574
Joined: August 2nd, 2008, 6:19 pm
Stroker Displacement: 284 CI
Location: Wading River, NY

Re: Mikey's Stroker build

Post by Mgardiner1 »

I am extremely please with his work, definitly top notch. He was a little concerned that they were not the silvolites, but after a few measurements he said it was do-able.
oletshot wrote:....and silvolites are only cast not hypericantspellits. :-)
User avatar
Muad'Dib
Site Admin / Owner
Site Admin / Owner
Posts: 1497
Joined: January 8th, 2008, 10:55 am
Stroker Displacement: 4.7L
Vehicle Year: 1990
Vehicle Make: Jeep
Vehicle Model: Cherokee
Location: Bend, Oregon
Contact:

Re: Mikey's Stroker build

Post by Muad'Dib »

Mgardiner1 wrote:I am extremely please with his work, definitly top notch. He was a little concerned that they were not the silvolites, but after a few measurements he said it was do-able.
I would also recommend him for any and all machine work that he says he can do. Hes done excellent work for me, and i have only seen the same standard from everyone else who has posted about work from him...
If it feels right, then STROKE it!
You're lucky that hundred shot of CAPS LOCK didn't blow the welds on the forum!!
User avatar
Mgardiner1
Donator
Donator
Posts: 574
Joined: August 2nd, 2008, 6:19 pm
Stroker Displacement: 284 CI
Location: Wading River, NY

Re: Mikey's Stroker build

Post by Mgardiner1 »

Tonight, i installed the crank oil slinger, installed the front seal in the timing cover housing, and installed that on the block. I took some time to sandblast some hardware and installed my new high volume water pump as well. I filled and primed my new standard flow Melling oil pump with GM EOS and installed that. I sandblasted some more hardware and carefully cleaned the inside of my oil pan. I blasted it last night (inside and out), took it to work and flushed it out in our parts washer today, and still took brake cleaner and wiped the inside by hand. I layed out my one piece rubber oil pan gasket and dropped the pan on. I paid careful attention to the rear main cap, I screwed up a one piece gasket on my current YJ 4.0 and it leaked just as bad as when i started :)

I threw a first coat of paint on the oil pan and hardware and had dinner. I was going to slide the lifters in and drop the head on tonight until i ran into a discrepancy.....

The machinist told me through his measurements that he decked the block enough to leave the pistons .002" in the bores. Turns out he's about .005" off. I measured .007" on #1 and .011" on #6. My goal was to achieve a quench of .055" or less. This would not be a problem if i could locate a .043 VR head gasket, but i can't. I will probably just use my .051 HG tomorrow and deal with my quench of .057"

You guys think it would even be noticable? It also alters my compression ratio, which i was pretty happy with what i was going to achieve with the #'s i was using. I mean, if 2 motors were built exactly the same, one with .008" more quench and .1 CR less, you think that it would make or break running on 87? or be the difference between 250 hp and 255 hp? I think i'm worrying over nothing. I think tomorrow after work i'll just get busy and drop the head on it.
oletshot wrote:....and silvolites are only cast not hypericantspellits. :-)
User avatar
Mgardiner1
Donator
Donator
Posts: 574
Joined: August 2nd, 2008, 6:19 pm
Stroker Displacement: 284 CI
Location: Wading River, NY

56K Killa!!!

Post by Mgardiner1 »

Since nobody chimed back about the head gasket, so i went with the stock replacement that i have on hand. I measured the "uncrushed" height was .052. I have a buddy who used to own an automotive parts store. He checked around for me today, and could not find anybody locally that distribute victor reinz gaskets. Oh well. Moving on.

I installed all 12 lifters with a coating of GM EOS around the body of the lifter, and the included mopar performance cam lube on the flat tappet portion of the lifter. I CC'd the head before i set it down, and came up with 61ish CC's. I was getting frustrated with my CC equipment, so i left it at that and threw the head on and torqued her down.

I was exciting to find that the machine shop seems to have removed enough material from the stems of the valves to make up the difference from the decked block. I used 2 old push rods tonight to check, and i can get preload set at 0 lash, then 3/4 turn. I'll be ordering a new set of standard length rods tomorrow.

While i'm waiting for the push rods, i've got plenty more sand/bead blasting to do tomorrow after work. Hell, maybe i'll have a mental health day and take care of it :-)

I've got several pics of the combustion chamber to show how i smoothed out the hump by the spark plug hole (sorry, no before pictures). Before the machine shop did any work on it, they put the head through a steal bead bombardment. It smooths everything out. Every sharp edge that was left behind that i either couldn't touch with the grinder, or didn't think was a problem, became smooth and very nicely blended. Check it out

This thread is now offically a 56K KILLA!!

Image

Image

Image

Image

Image

Image

Image

Image

Image

Image

Image

Image

Image

Image

Image

Image

Image
oletshot wrote:....and silvolites are only cast not hypericantspellits. :-)
dwg86
Donator
Donator
Posts: 1201
Joined: February 13th, 2008, 6:20 pm
Stroker Displacement: 4.6
Vehicle Year: 2003
Vehicle Make: Jeep
Vehicle Model: Wrangler
Location: Atlanta, Ga

Re: Mikey's Stroker build

Post by dwg86 »

Looks pretty! :D
User avatar
Mgardiner1
Donator
Donator
Posts: 574
Joined: August 2nd, 2008, 6:19 pm
Stroker Displacement: 284 CI
Location: Wading River, NY

Re: Mikey's Stroker build

Post by Mgardiner1 »

dwg86 wrote:Looks pretty! :D

I can't figure out if i like your chamber work better or mine....

I noticed in the pictures of yours, i can see the faint ring you scribed around the top. Is that the 4" hole for the head gasket?

I think with my chamber work, it creates some quench at the spark plug side of the bore as well, so i should have air being squeezed into the chamber from both directions. However, your looks like it might "breathe" better. Not sure which may be better!
oletshot wrote:....and silvolites are only cast not hypericantspellits. :-)
dwg86
Donator
Donator
Posts: 1201
Joined: February 13th, 2008, 6:20 pm
Stroker Displacement: 4.6
Vehicle Year: 2003
Vehicle Make: Jeep
Vehicle Model: Wrangler
Location: Atlanta, Ga

Re: Mikey's Stroker build

Post by dwg86 »

Yes the ring is the scribe mark from the MP head gasket. I think both should both flow pretty good. I did remove the lip that is formed around the valve in the combustion chamber when they machine for the valves. I read somewhere that this will improve flow into and out of the combustion chamber. I have the cracked head that came on my donor engine. I will some pics of the combustion chamber of both heads. I didn't get any before pics of the ported head, so this is the only way I can do a "before and after" comparison.

When do you plan on getting the engine running? Can't wait to here about it!
User avatar
Mgardiner1
Donator
Donator
Posts: 574
Joined: August 2nd, 2008, 6:19 pm
Stroker Displacement: 284 CI
Location: Wading River, NY

Re: Mikey's Stroker build

Post by Mgardiner1 »

I had a hard time getting a stone or sanding drum in the wall between the valve seat and the side of the combustion chamber, so rather then completely reshape that portion of the chamber, i left it alone.

Have you CC'd your head yet?

I hope to have the build close to being finished this weekend. I know there is going to be lots of little things i didn't take into account that will create problems. I have a 99+ intake coming in the next day or so. I plan to work that a little with the grinder for port matching and smoothing the runners. I already bored my TB to 62mm and made a throttle plate for it. I bead blasted all of the aluminum accessories. I love the way aluminum looks. I coated them in a clear lacquer to try to seal them so they do not oxidize. I just hope the heat doesn't destroy the finish. Gave them a pretty neat semi gloss appearance. I'll take pics of them when they are installed. So i anticipate running into problems with intake manifold and P/S setup. I also need to paint and cure my exhaust manifold. I plan to make a reducer from the 3" collector to the stock exhaust. I plan to get the engine running and use that until i have the opportunity to get it to a muffler shop where they can mandrel bend an exhaust for me.

The swap will most likely take more then one weekend, as i have to pull the renix harness out and install my modified 91 harness. I am still waiting for an answer on my question in the electrical section about the electric/cable driven HESCO speed sensor. I think i read about someone having stalling problems on decelleration because the computer wouldn't switch to the decel fuel map.

So to sum it up, i hope to start swapping in 2 weeks or less
oletshot wrote:....and silvolites are only cast not hypericantspellits. :-)
dwg86
Donator
Donator
Posts: 1201
Joined: February 13th, 2008, 6:20 pm
Stroker Displacement: 4.6
Vehicle Year: 2003
Vehicle Make: Jeep
Vehicle Model: Wrangler
Location: Atlanta, Ga

Re: Mikey's Stroker build

Post by dwg86 »

I cc'd the head with the stock valves. The combustion chambers cc'd @ 61.4 to 61.8. I will cc them again after the sbc valves are installed and head milled.
User avatar
Mgardiner1
Donator
Donator
Posts: 574
Joined: August 2nd, 2008, 6:19 pm
Stroker Displacement: 284 CI
Location: Wading River, NY

Re: Mikey's Stroker build

Post by Mgardiner1 »

Nothing much to brag about today. Got a bunch of sandblasting done to the majority of the front accessories and mounts, along with a good first coat of paint. I also recieved my 99+ intake. I flushed that out real well and treated it to a good bead blasting. Do i really need to get the new style power steering setup? I may entertain the idea of trying to adapt the original one too it. I also pulled the alternator apart tonight, it was locked up and wouldn't turn. Going to blast the housings while i have them apart as well
oletshot wrote:....and silvolites are only cast not hypericantspellits. :-)
User avatar
seanyb505
Donator
Donator
Posts: 447
Joined: February 16th, 2008, 9:34 am
Stroker Displacement: 280ci
Vehicle Year: 1997
Vehicle Make: Jeep
Vehicle Model: Cherokee
Location: West Palm Beach Florida

Re: Mikey's Stroker build

Post by seanyb505 »

I wish I could have cleaned all my accesories when I was putting it back together. The aluminum stuff looked horrible next to the orange and black engine.
Now I can be like all those other awesome people with more than one Jeep in their sig, but now I have to say one of them is sold:(
97 XJ 4.6
90 MJ 4.0 - sold

I want to have as many Jeeps as children. DD, offroader, drag MJ and another one. 4=4
Post Reply

Who is online

Users browsing this forum: No registered users and 3 guests