Given how incredibly stupid my last couple Russ motors were, this one should be pretty remarkable after a good tune.
I ran a 12:1 russ motor on a 7120 head and off the shelf pistons for a number of years with a stock renix ECU. It did it pretty good.
A little 4.7 for the DD.
-
cal
- Making Progress

- Posts: 61
- Joined: March 19th, 2008, 12:09 pm
- Stroker Displacement: 4.71
-
TJryder
- Making Progress
- Posts: 86
- Joined: July 29th, 2018, 1:03 pm
- Stroker Displacement: 4.6
- Vehicle Year: 2000
- Vehicle Make: Jeep
- Vehicle Model: TJ
Re: A little 4.7 for the DD.
Thanks for posting this. Waiting for 25-th January when my set gets picked up at Russ 
BR M
BR M
°O|||||||O°
-
cal
- Making Progress
- Posts: 61
- Joined: March 19th, 2008, 12:09 pm
- Stroker Displacement: 4.71
Re: A little 4.7 for the DD.
Well, back at it this weekend.
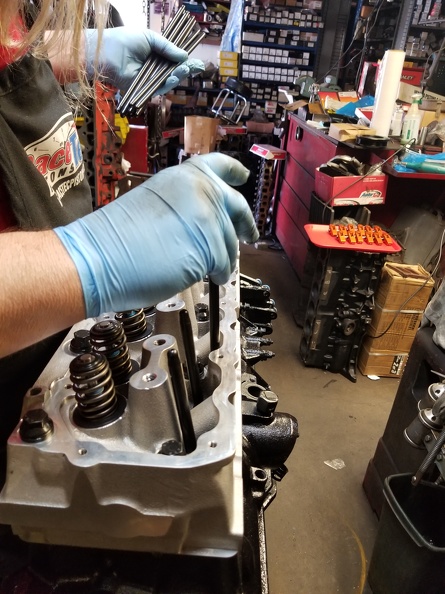
First Russ had to finish assembling the head. The Edelbrock head uses a .500" valve stem seal instead of the .530 that the jeep heads use, so we had to special order them.

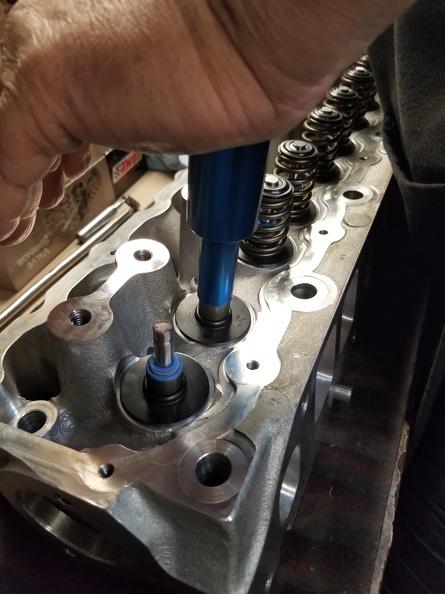
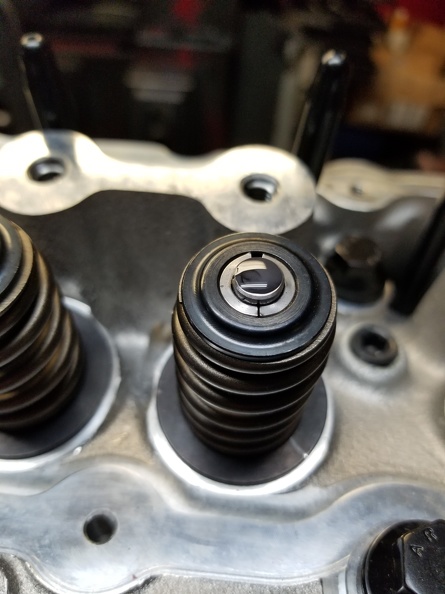
It also uses a 1.5" installed height valve spring, VS jeep's 1.7", so it takes different valve springs. With hard seats installed in the aluminium head, you need a stiffer valve spring as well, to keep the valve from bouncing at high RPM. The spring Russ came up with is 140 pounds on the seat and 285 on the nose, which is pretty perfect.
You'll notice the hardened shim under the spring to protect the head from the valve galling it.

First Russ had to finish assembling the head. The Edelbrock head uses a .500" valve stem seal instead of the .530 that the jeep heads use, so we had to special order them.
It also uses a 1.5" installed height valve spring, VS jeep's 1.7", so it takes different valve springs. With hard seats installed in the aluminium head, you need a stiffer valve spring as well, to keep the valve from bouncing at high RPM. The spring Russ came up with is 140 pounds on the seat and 285 on the nose, which is pretty perfect.
You'll notice the hardened shim under the spring to protect the head from the valve galling it.
-
cal
- Making Progress
- Posts: 61
- Joined: March 19th, 2008, 12:09 pm
- Stroker Displacement: 4.71
Re: A little 4.7 for the DD.
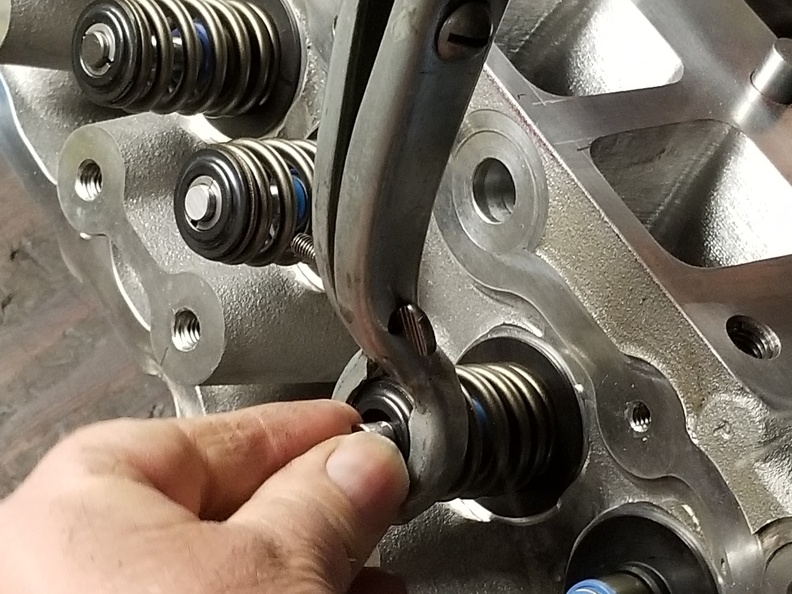
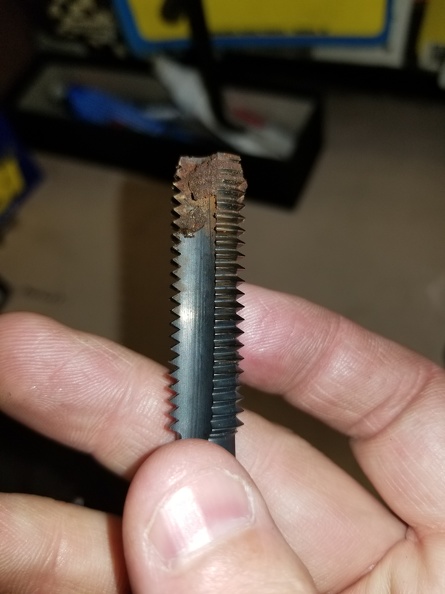
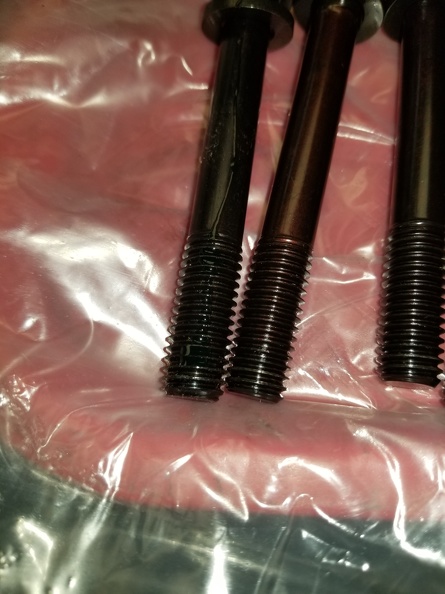
Next I pulled out my thread chaser and cleaned all the head bolt threads before installing the head.

Even after scrubbing them.. damn.
Even after scrubbing them.. damn.
-
cal
- Making Progress
- Posts: 61
- Joined: March 19th, 2008, 12:09 pm
- Stroker Displacement: 4.71
Re: A little 4.7 for the DD.
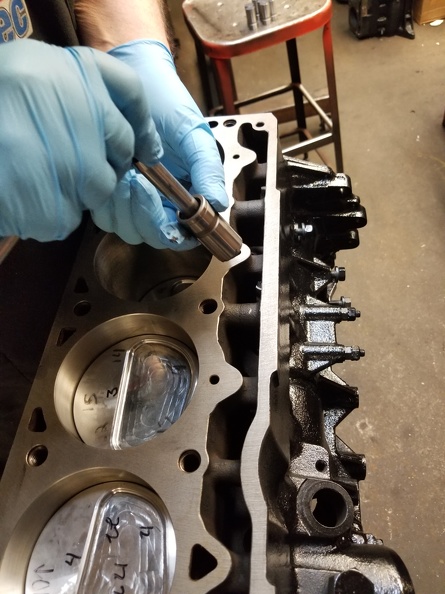
Dropped the dowels in place and installed.


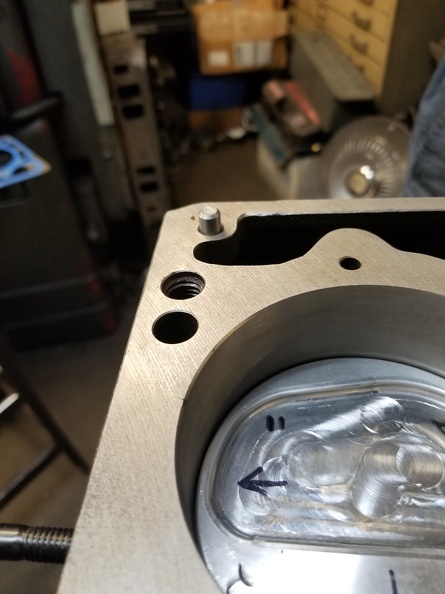
Then dropped a .043" MLS gasket on. Mopar Performance and Victor Reinz sell this as an upgrade, but Felpro and Jeep use it as the stock gasket for 04-06 4.0's so just about anywhere carries it in Felpro now.
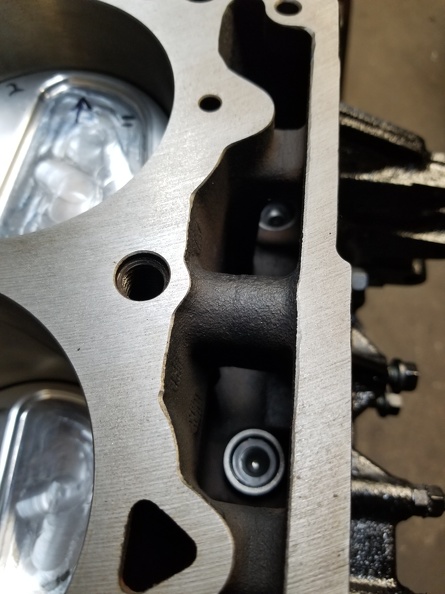
You can see the gasket is just a hair bigger than the cylinder. Russ punches these things out up to .080 over on this gasket, although mine is only 60 over.
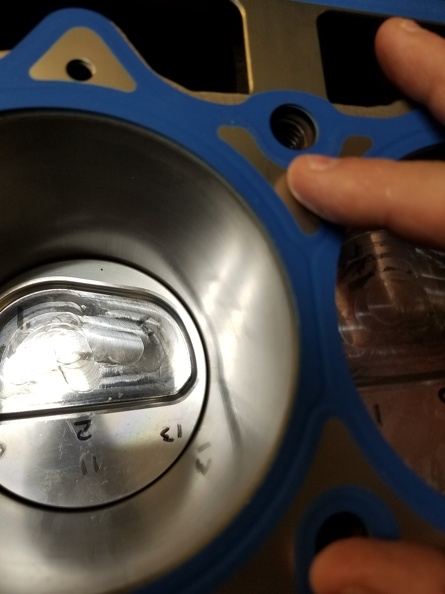
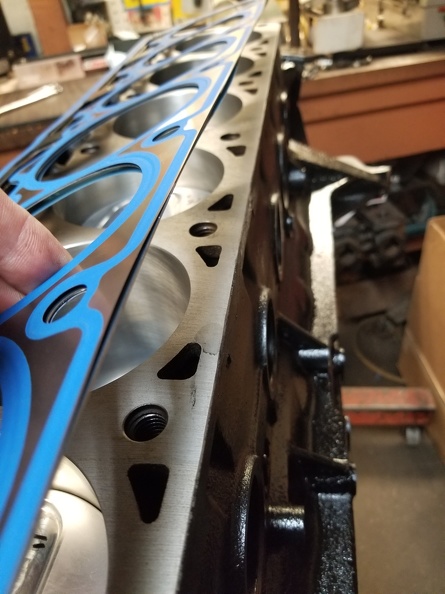
One thing I found interesting, both the head and the block have water jackets that are blocked by the gasket and do not line up to anything on the other object - they are just there to add cooling surface.

Then dropped a .043" MLS gasket on. Mopar Performance and Victor Reinz sell this as an upgrade, but Felpro and Jeep use it as the stock gasket for 04-06 4.0's so just about anywhere carries it in Felpro now.
You can see the gasket is just a hair bigger than the cylinder. Russ punches these things out up to .080 over on this gasket, although mine is only 60 over.
One thing I found interesting, both the head and the block have water jackets that are blocked by the gasket and do not line up to anything on the other object - they are just there to add cooling surface.
-
cal
- Making Progress
- Posts: 61
- Joined: March 19th, 2008, 12:09 pm
- Stroker Displacement: 4.71
Re: A little 4.7 for the DD.
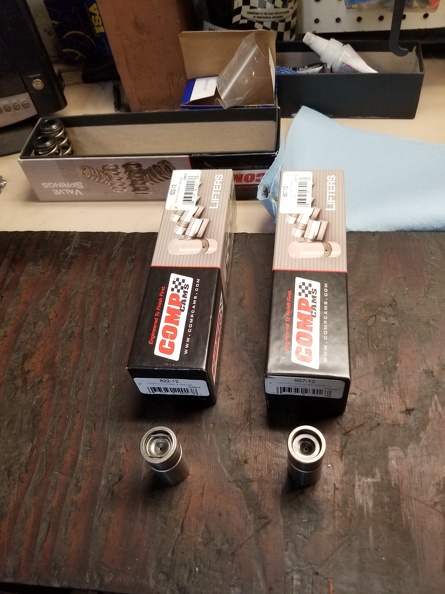
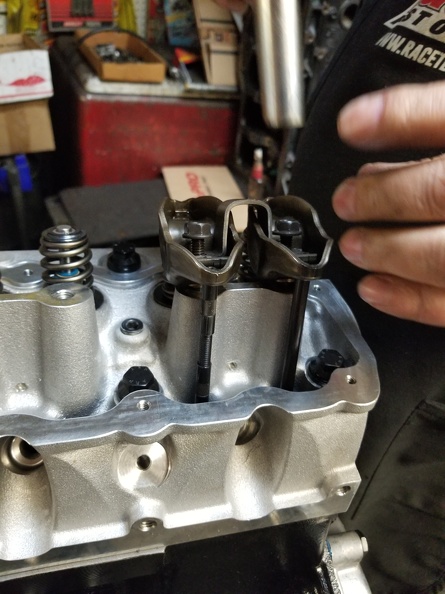
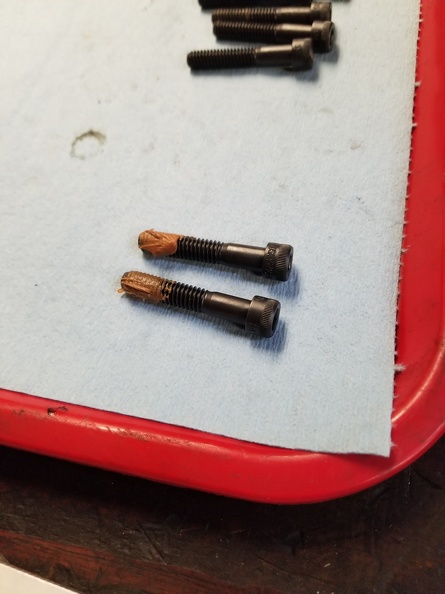
We're using Comp's High Energy lifter. It doesn't have as much hydraulic travel as the standard ones do, but is built as a higher quality part. Look at the difference in the clips here:
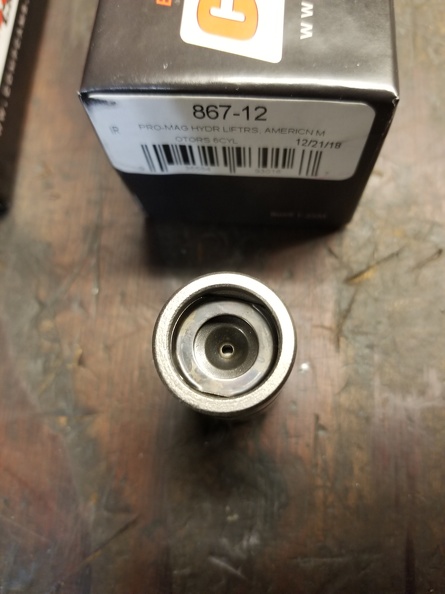
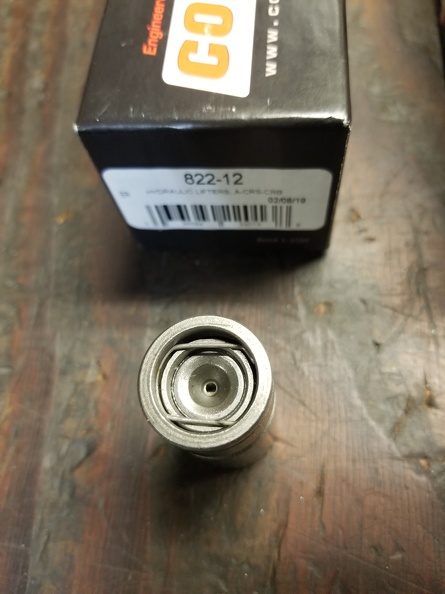
This isn't very high precision, but you can see here how deep the plunger goes into each
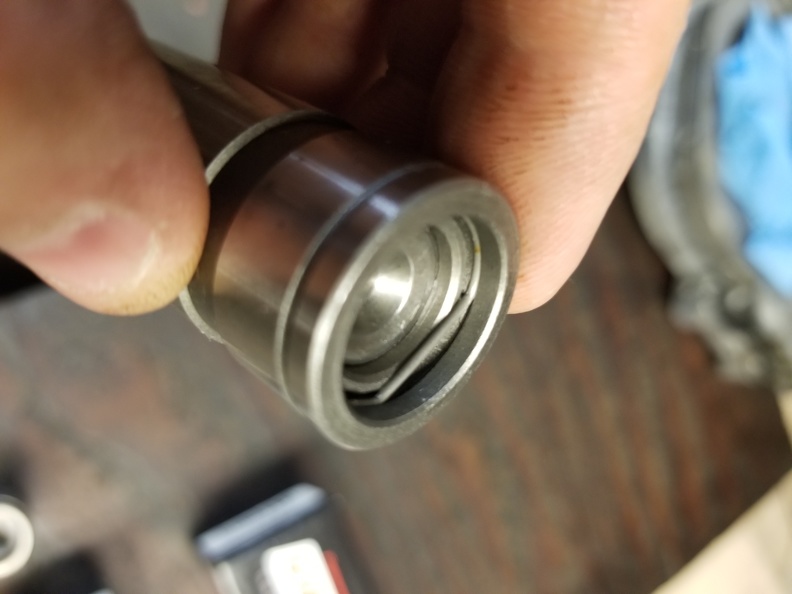

I can't see the difference, but Russ assures me there is one. I can sure see a difference in part quality though.
Russ lubes them up with his favorite moly lube.

And then uses a magnet to drop them into their bore. (we removed the head gasket again)
This isn't very high precision, but you can see here how deep the plunger goes into each
I can't see the difference, but Russ assures me there is one. I can sure see a difference in part quality though.
Russ lubes them up with his favorite moly lube.
And then uses a magnet to drop them into their bore. (we removed the head gasket again)
-
cal
- Making Progress
- Posts: 61
- Joined: March 19th, 2008, 12:09 pm
- Stroker Displacement: 4.71
Re: A little 4.7 for the DD.
Dropped the gasket back on, and dropped the head on.
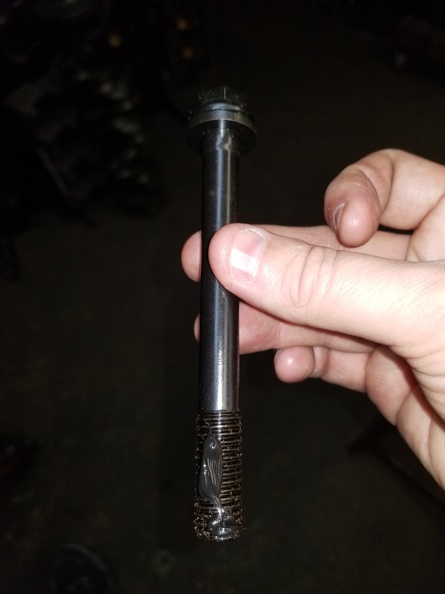
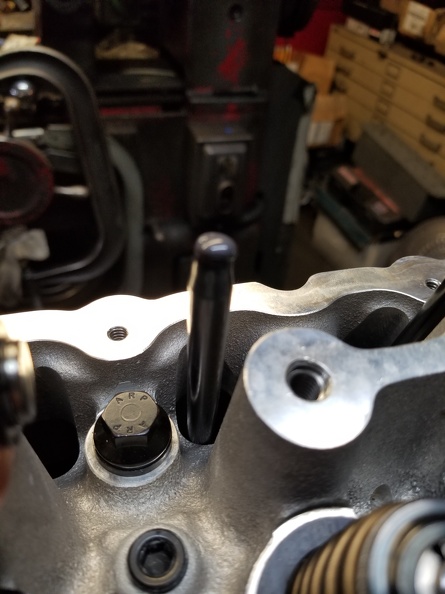
We're using ARP head bolts. ARP provides a lube for the threads which Russ suggests not using as it affects torque values more than he likes.
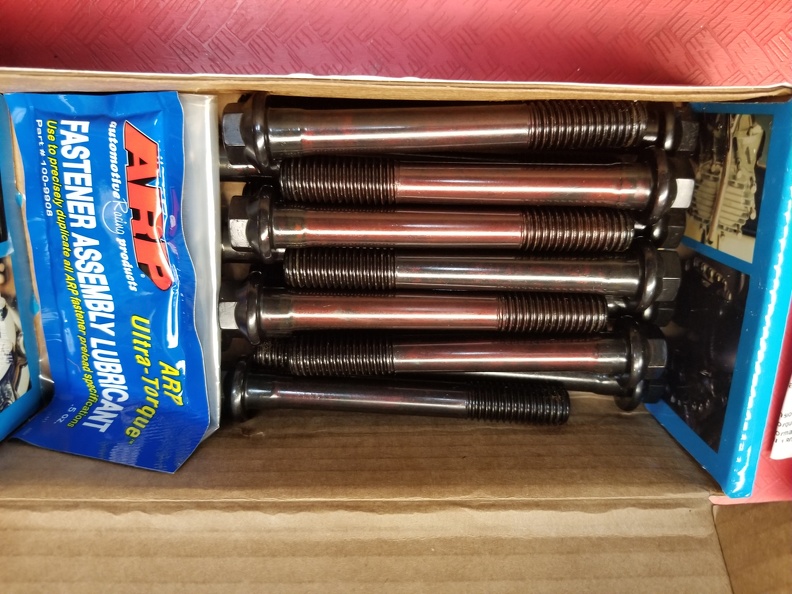
They also come with hardened washers.

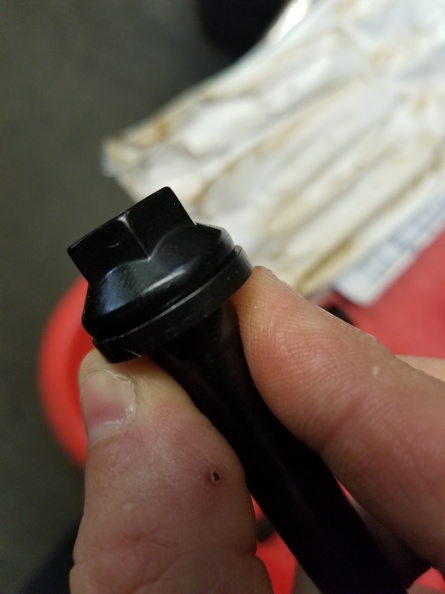
You'll find the washers are beveled on one side to clear the radius under the bolt head.
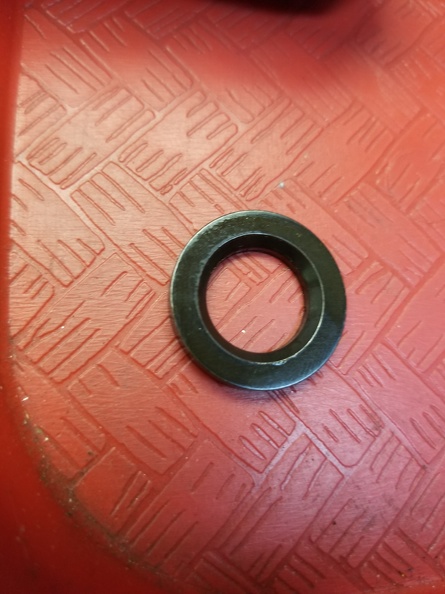

Must be installed in the correct orientation. This one is backward, you can see the washer does not contact the bolt head.
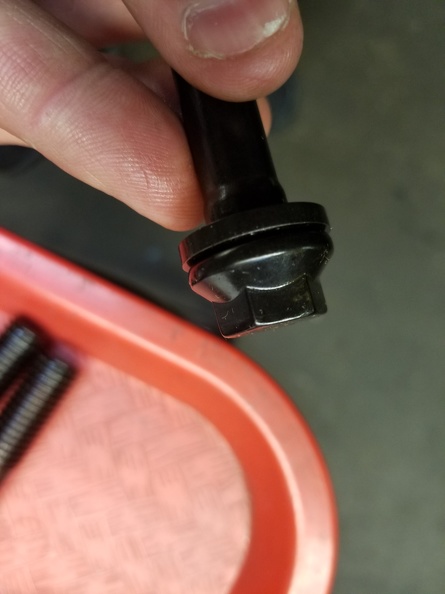
This one is correct.
A drop of lube between the bolt and washer
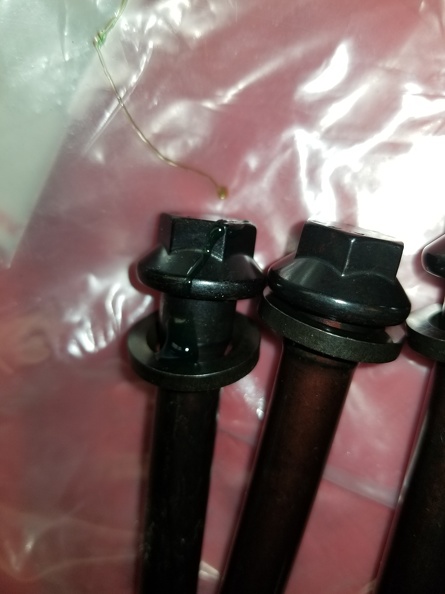
A little stripe on the threads
The front drivers side bolt gets sealant on the threads instead, as it goes into a water jacket.
And torque to 25, then 40, then 80. The 4.0 is usually 100, but you use less torque on the aluminium head.
We're using ARP head bolts. ARP provides a lube for the threads which Russ suggests not using as it affects torque values more than he likes.
They also come with hardened washers.
You'll find the washers are beveled on one side to clear the radius under the bolt head.
Must be installed in the correct orientation. This one is backward, you can see the washer does not contact the bolt head.
This one is correct.
A drop of lube between the bolt and washer
A little stripe on the threads
The front drivers side bolt gets sealant on the threads instead, as it goes into a water jacket.
And torque to 25, then 40, then 80. The 4.0 is usually 100, but you use less torque on the aluminium head.
-
cal
- Making Progress
- Posts: 61
- Joined: March 19th, 2008, 12:09 pm
- Stroker Displacement: 4.71
Re: A little 4.7 for the DD.
The Rollmaster timing sets Russ uses are adjustable 9 ways (+8* and -8* in 2* increments).
Russ installed this one strait up (there is 4* of advance built in the cam). he marked the 0* marks at the crank and alignment with a marker before installation to avoid mistakes.
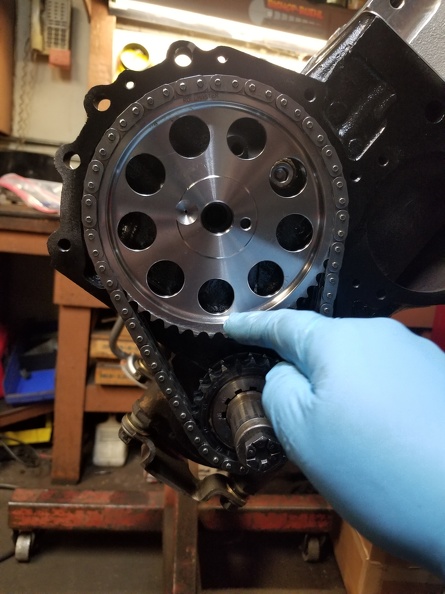
Russ has his own cam button bolts made with a nylon button in them. Its more precise than the factory push spring, but allows aftermarket timing sets unlike they late model retainer fork.
To use them you need a late model timing cover, or to machine the nipple off of an earlier one. Needs to look like this:
And not this:
Bolt the cover down:
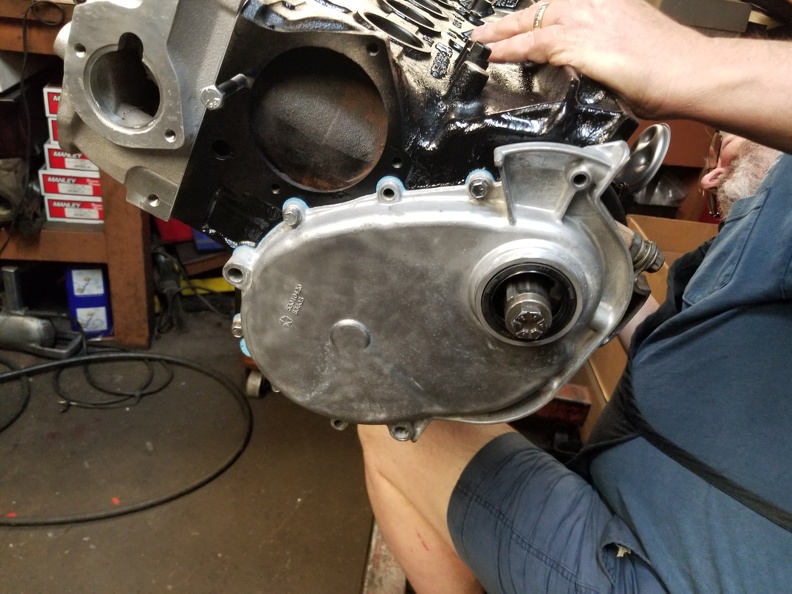
And then check endplay on the cam. It needs to just barely move.
I didn't get pictures of it but he ended up sanding just a couple of thousands off the end of the button to get it how he wants it.
Once that was done he honed a couple thousands off the inside of the harmonic balancer to make it easier to R&R.
Russ installed this one strait up (there is 4* of advance built in the cam). he marked the 0* marks at the crank and alignment with a marker before installation to avoid mistakes.
Russ has his own cam button bolts made with a nylon button in them. Its more precise than the factory push spring, but allows aftermarket timing sets unlike they late model retainer fork.
To use them you need a late model timing cover, or to machine the nipple off of an earlier one. Needs to look like this:
And not this:
Bolt the cover down:
And then check endplay on the cam. It needs to just barely move.
I didn't get pictures of it but he ended up sanding just a couple of thousands off the end of the button to get it how he wants it.
Once that was done he honed a couple thousands off the inside of the harmonic balancer to make it easier to R&R.
-
cal
- Making Progress
- Posts: 61
- Joined: March 19th, 2008, 12:09 pm
- Stroker Displacement: 4.71
Re: A little 4.7 for the DD.
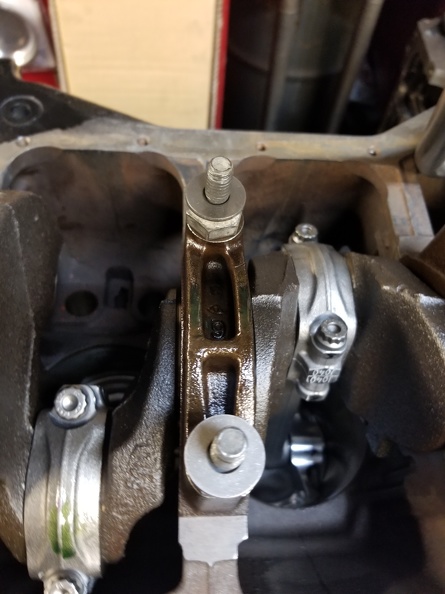
I realize as i look at pictures that I skipped the girdle install. Sorry this is out of order.
Dropped the girdle on and ran it down hand tight.
You'll see that Russ ground it to clear the rods.

Still just a little too tight.
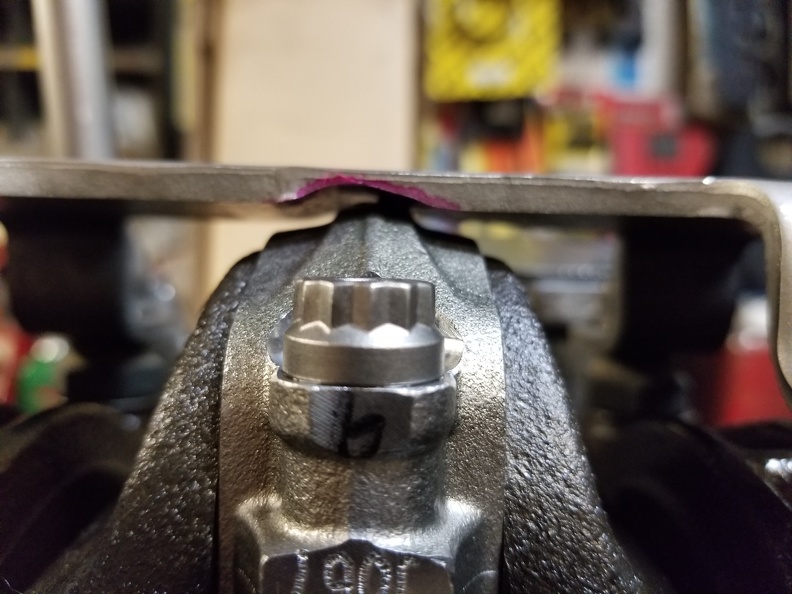
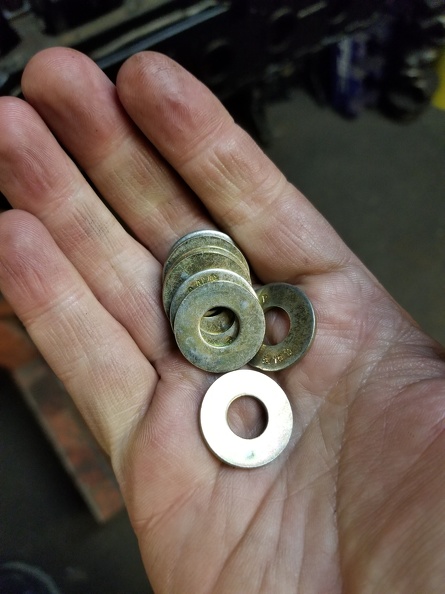
So we add a handful of hardened .060 washers.
Looks good now
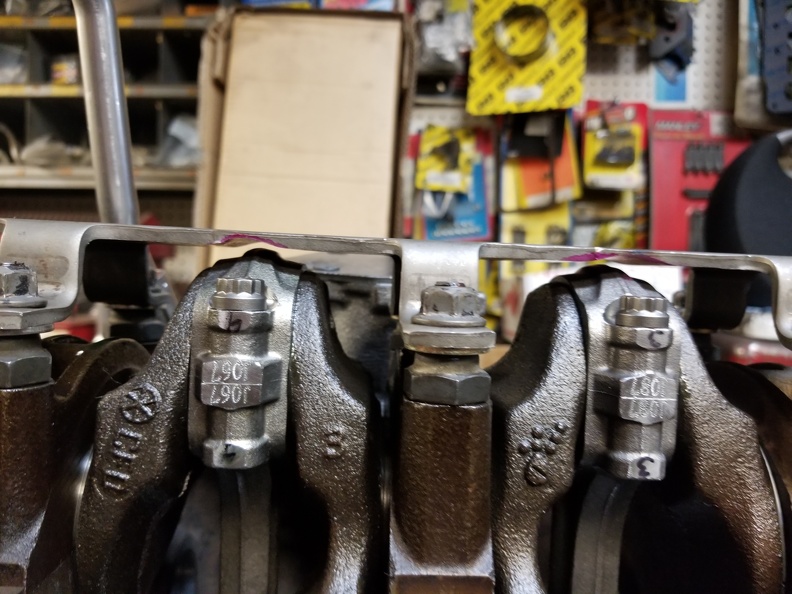
Red locktite on the nuts and run them home.
Dropped the girdle on and ran it down hand tight.
You'll see that Russ ground it to clear the rods.
Still just a little too tight.
So we add a handful of hardened .060 washers.
Looks good now
Red locktite on the nuts and run them home.
-
cal
- Making Progress
- Posts: 61
- Joined: March 19th, 2008, 12:09 pm
- Stroker Displacement: 4.71
Re: A little 4.7 for the DD.
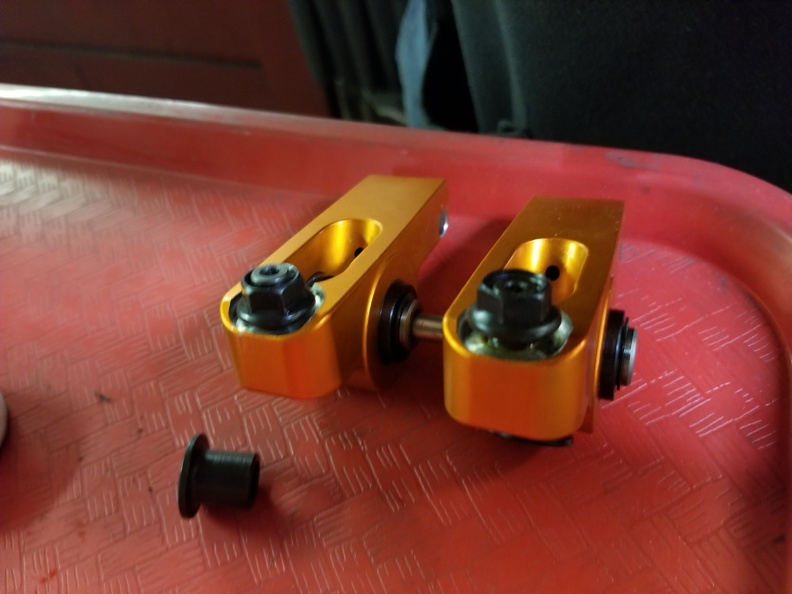
Now we drop a couple of pushrods in and do some fitment testing. We're starting with 9.550 length .080 wall 5/16 pushrods from Manley.

And re-using the Harland Sharp 1.6 ratio adjustable roller rockers off of 4643.
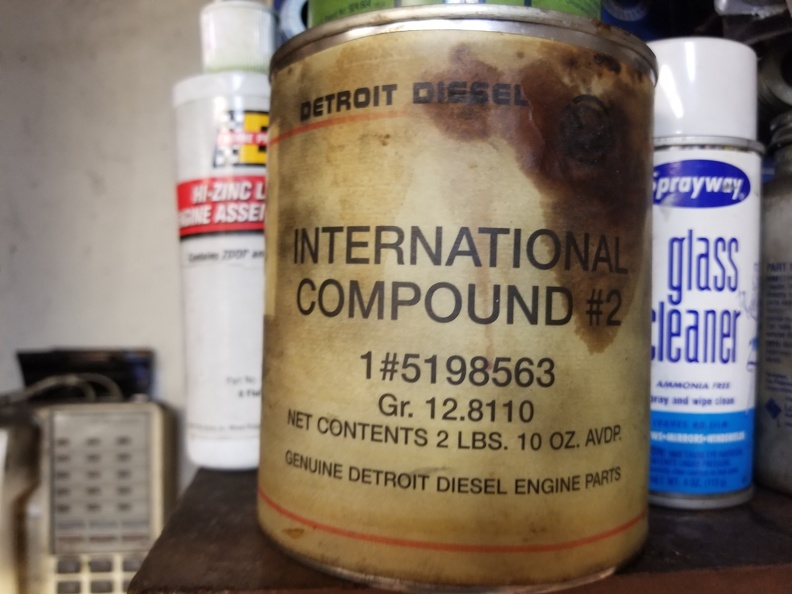
Russ installs the hardware with what he calls 'peanut butter' which is a compound specifically to avoid galling the aluminium threads on the head.
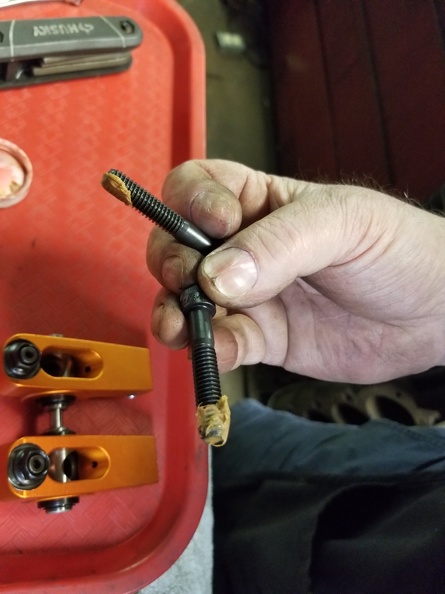
It comes from Detroit Diesel.
During installation Russ puts a towel over the pushrod holes to help prevent dropped hardware from getting into the motor.
I start lacking some photos here, but the pushrods were way too short. Next we tried some 9.600 5/16 .080 wall pushrods from Comp, those too were a bit too short.
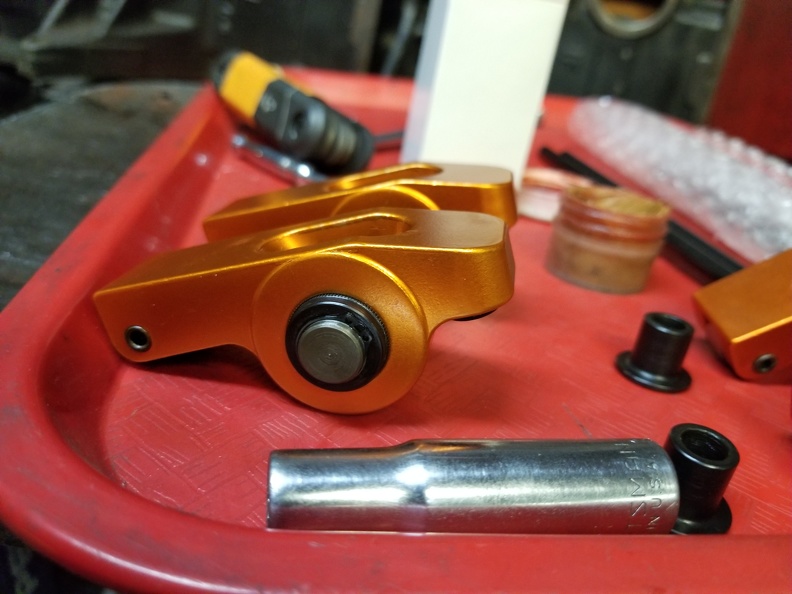
Just to see, we tried Russ's 1.65 ratio fixed roller rockers that Harland custom makes for him. Notice the dovetail on the pushrod end, Russ had them change the profile so that they fit under a stock valve cover..
Pushrods are still a little short, so Russ got his adjustable pushrod out to take some measurements.
And again with the adjustable rockers:
Just to see we measure with stock rockers.
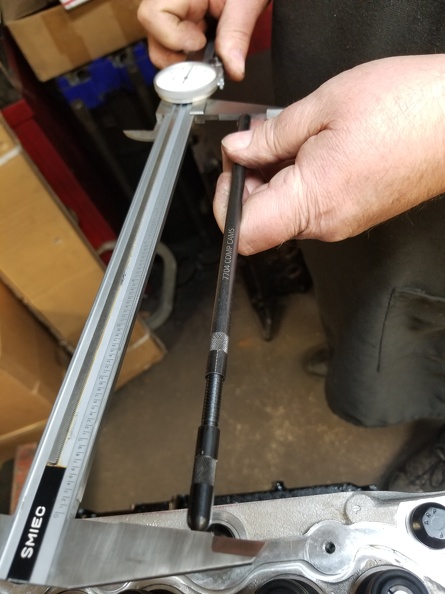
In each case the motor really wants 9.650" pushrods, which I seem to remember we had to use on 4643 as well with the high energy lifters and the roller rockers. The ones that came out of that motor are around here somewhere, but we don't know exactly where they are so I just ordered up a new set - therefor, we aren't finishing today. I have a set of Comp Cam's 9.650" 3/8 .135" wall push rods on their way from Summit Racing.
And re-using the Harland Sharp 1.6 ratio adjustable roller rockers off of 4643.
Russ installs the hardware with what he calls 'peanut butter' which is a compound specifically to avoid galling the aluminium threads on the head.
It comes from Detroit Diesel.
During installation Russ puts a towel over the pushrod holes to help prevent dropped hardware from getting into the motor.
I start lacking some photos here, but the pushrods were way too short. Next we tried some 9.600 5/16 .080 wall pushrods from Comp, those too were a bit too short.
Just to see, we tried Russ's 1.65 ratio fixed roller rockers that Harland custom makes for him. Notice the dovetail on the pushrod end, Russ had them change the profile so that they fit under a stock valve cover..
Pushrods are still a little short, so Russ got his adjustable pushrod out to take some measurements.
And again with the adjustable rockers:
Just to see we measure with stock rockers.
In each case the motor really wants 9.650" pushrods, which I seem to remember we had to use on 4643 as well with the high energy lifters and the roller rockers. The ones that came out of that motor are around here somewhere, but we don't know exactly where they are so I just ordered up a new set - therefor, we aren't finishing today. I have a set of Comp Cam's 9.650" 3/8 .135" wall push rods on their way from Summit Racing.
-
cal
- Making Progress
- Posts: 61
- Joined: March 19th, 2008, 12:09 pm
- Stroker Displacement: 4.71
Re: A little 4.7 for the DD.
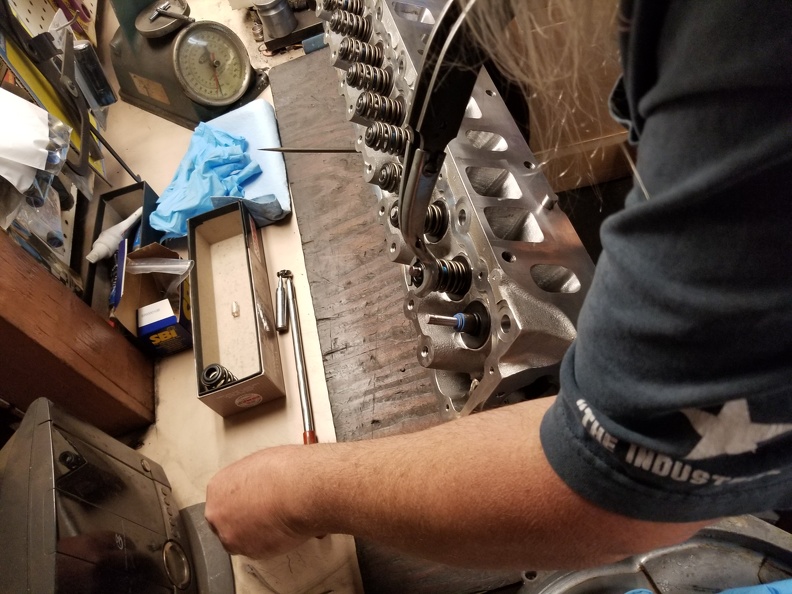
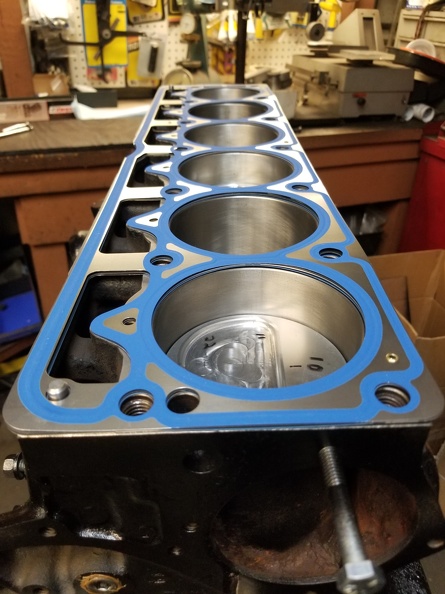
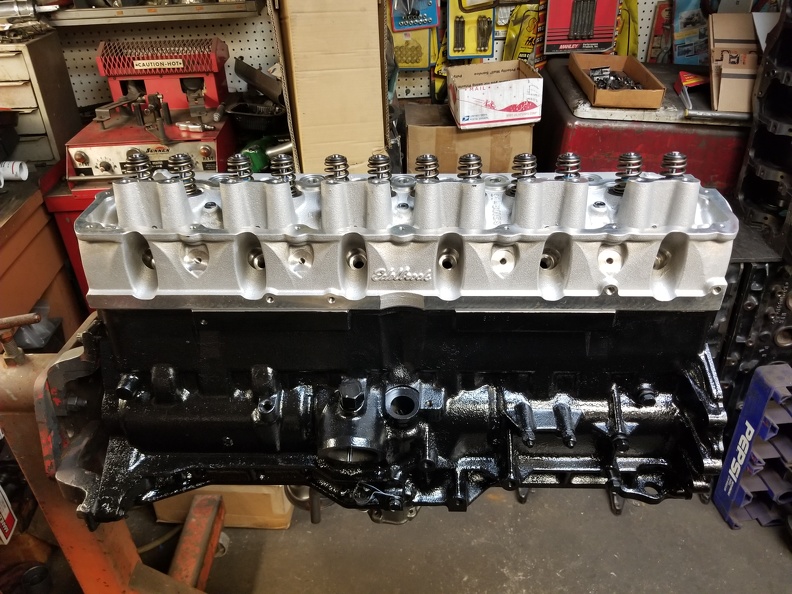
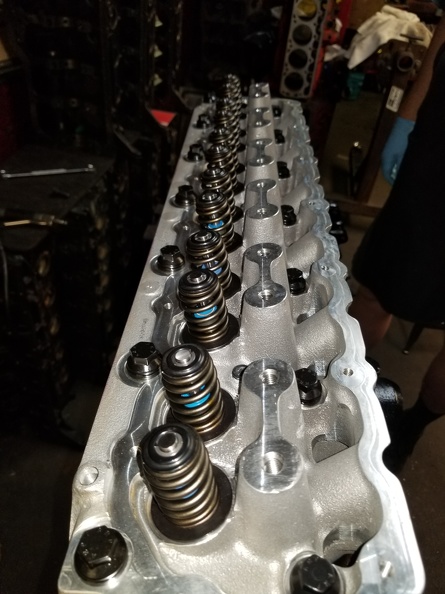
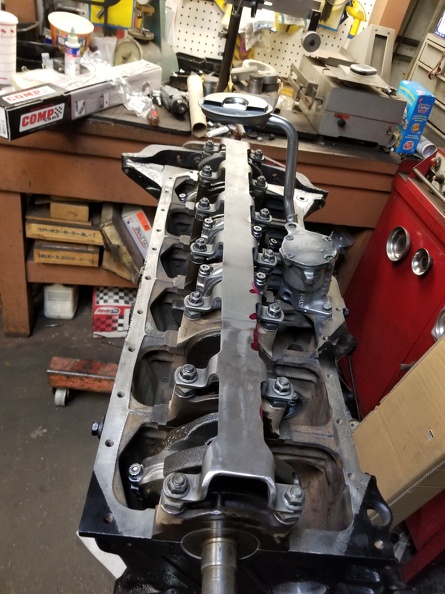
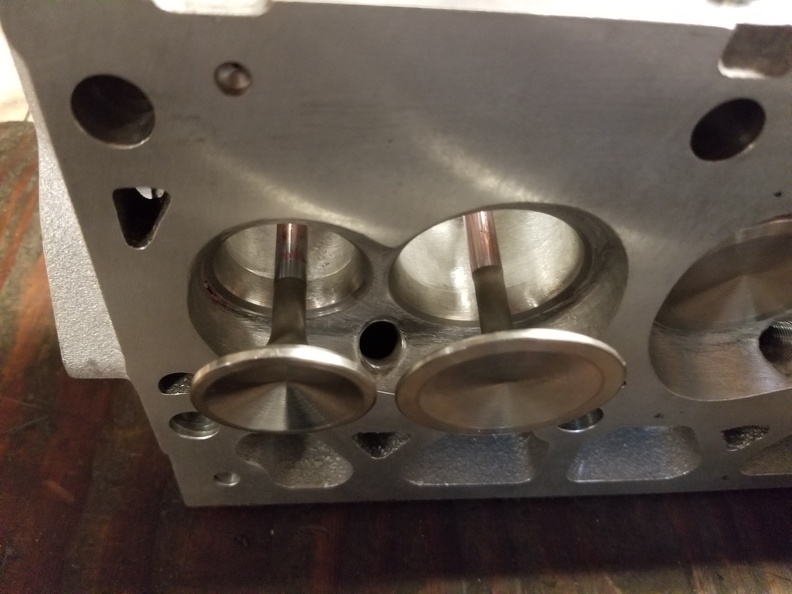
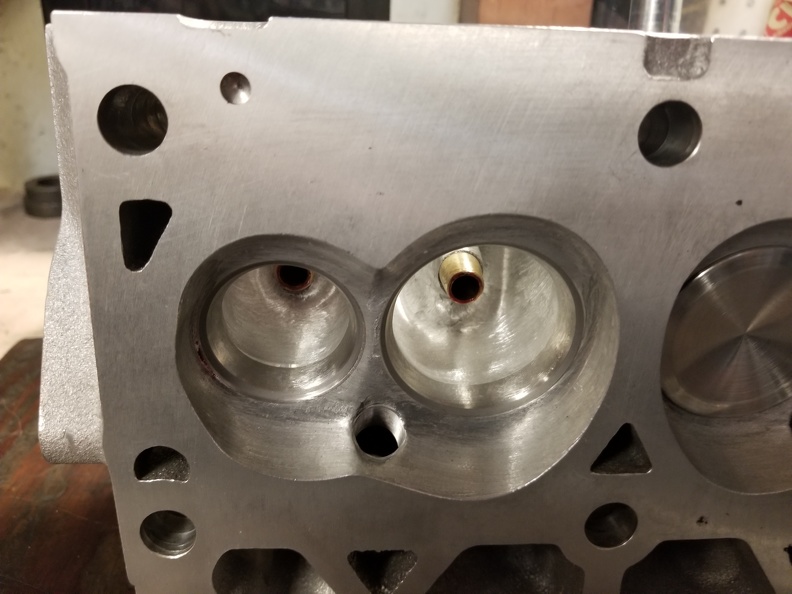
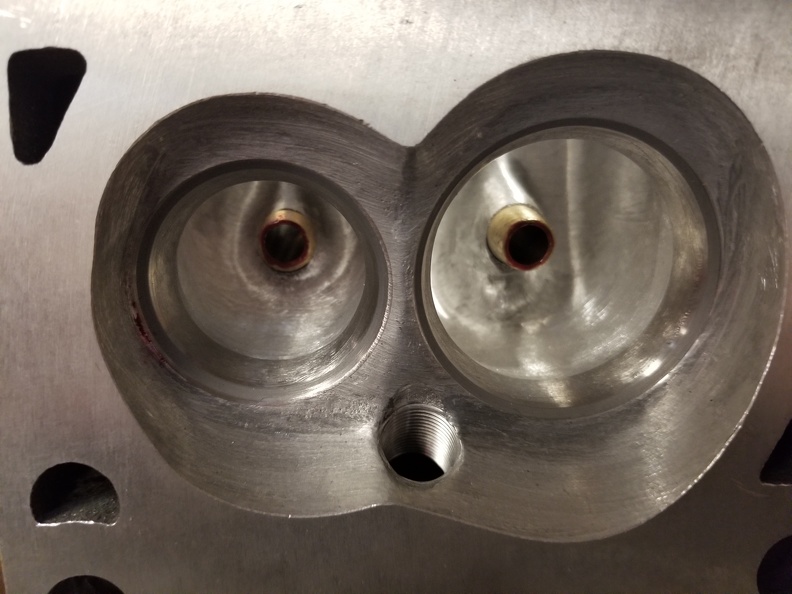
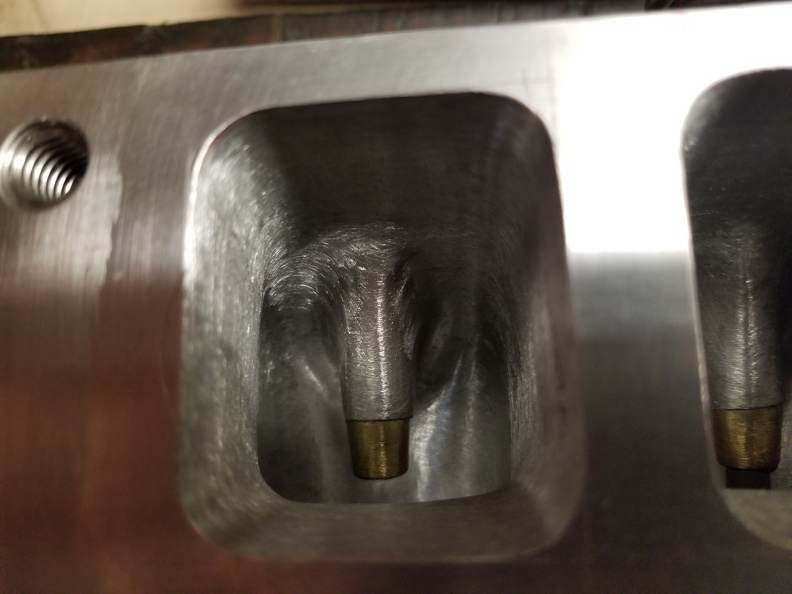
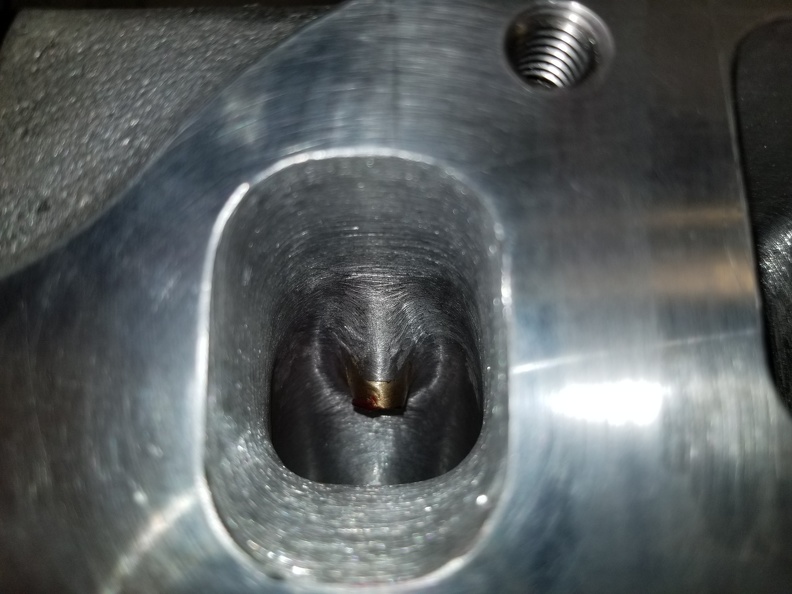
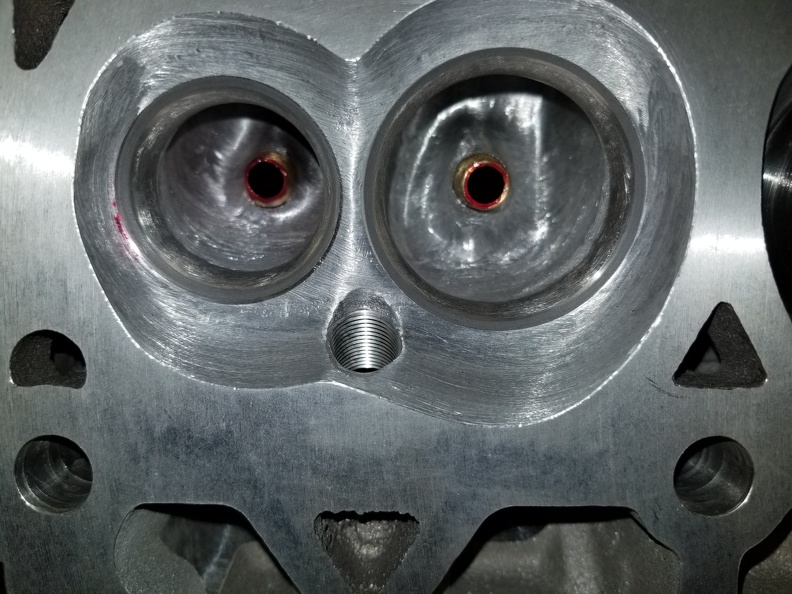
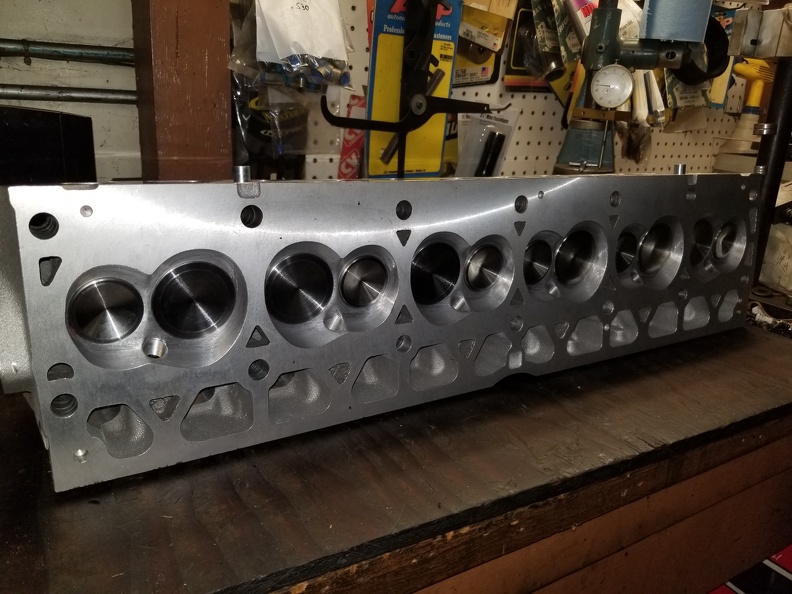
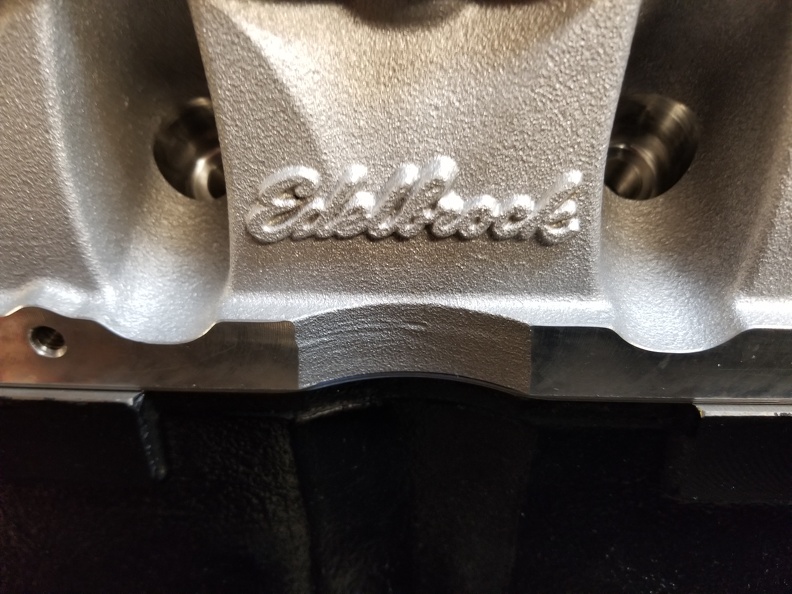
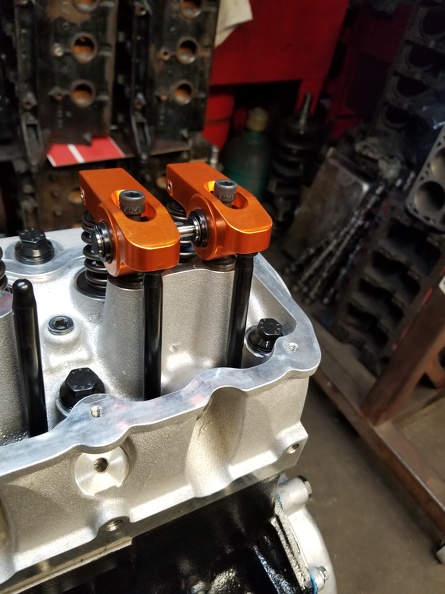
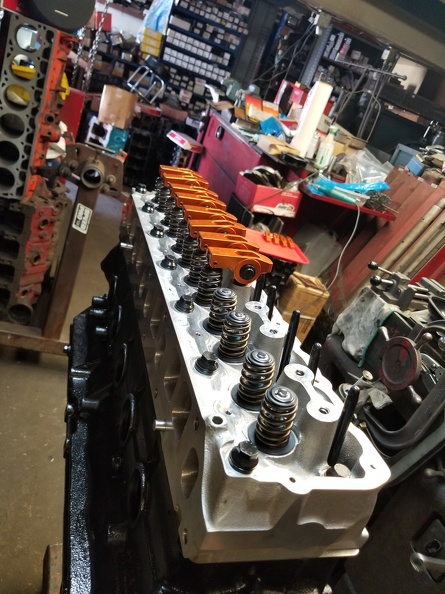
That's about as far as we've gotten for today, but he's some head porn for you until the new push rods arrive.
-
SkylinesSuck
- Donator

- Posts: 545
- Joined: February 14th, 2009, 11:11 pm
- Stroker Displacement: 4.6L
- Vehicle Year: 1998
- Vehicle Make: Jeep
- Vehicle Model: Wrangler
- Location: Northern VA
Re: A little 4.7 for the DD.
Thanks for all the details and pics! Got my head swimming for when I install mine in the coming months.
-
cal
- Making Progress
- Posts: 61
- Joined: March 19th, 2008, 12:09 pm
- Stroker Displacement: 4.71
Re: A little 4.7 for the DD.
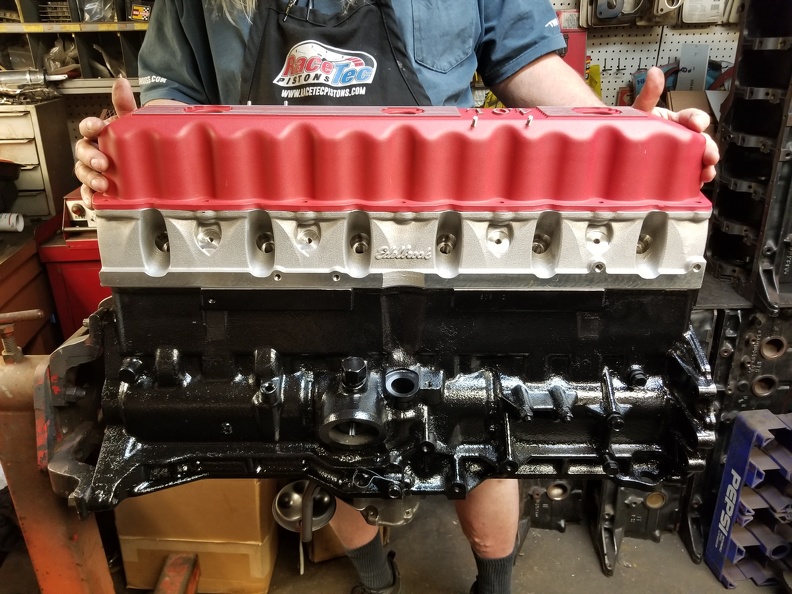
Alright, finishing up the tech.
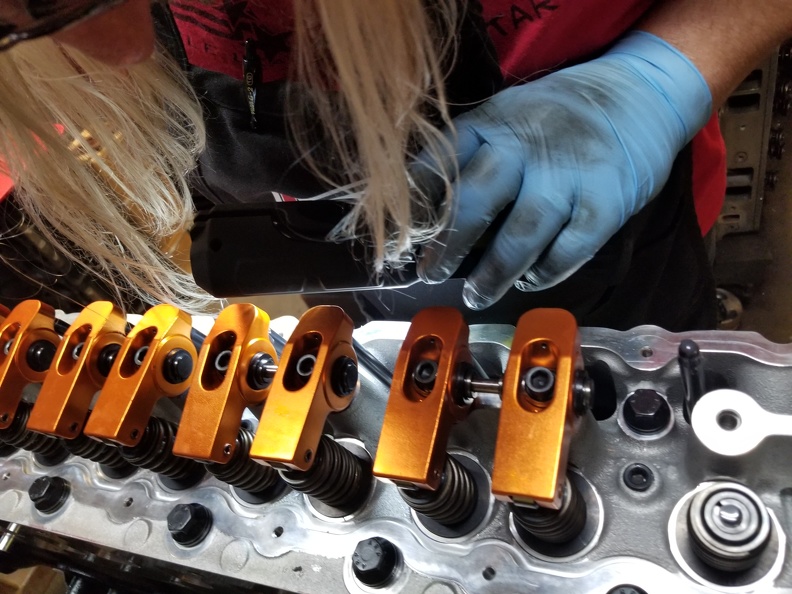
We got the 9.650 push rods in. At the last minute I decided to sell a friend the 1.6 adjustable roller rockers for his build and switch over to the 1.65:1 ratio fixed roller rockers. I get just a little more cam out of it and don't have to worry about adjusters.
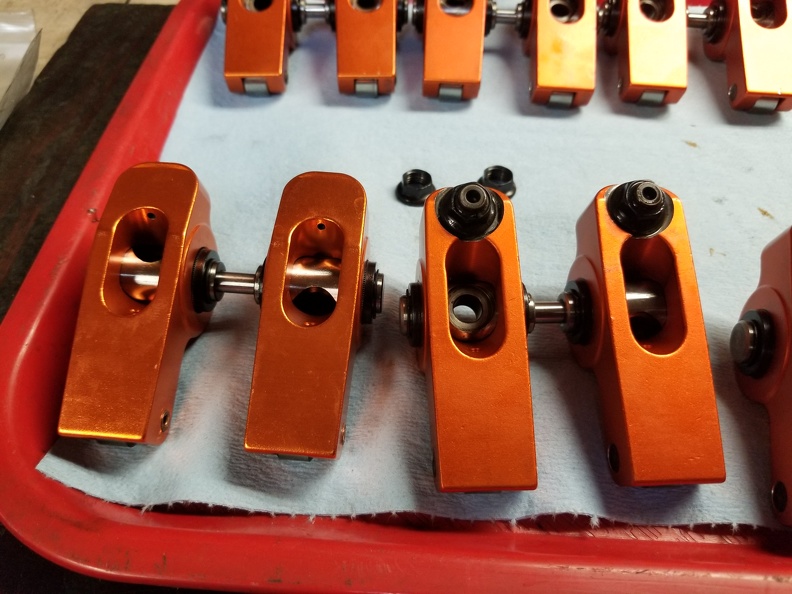
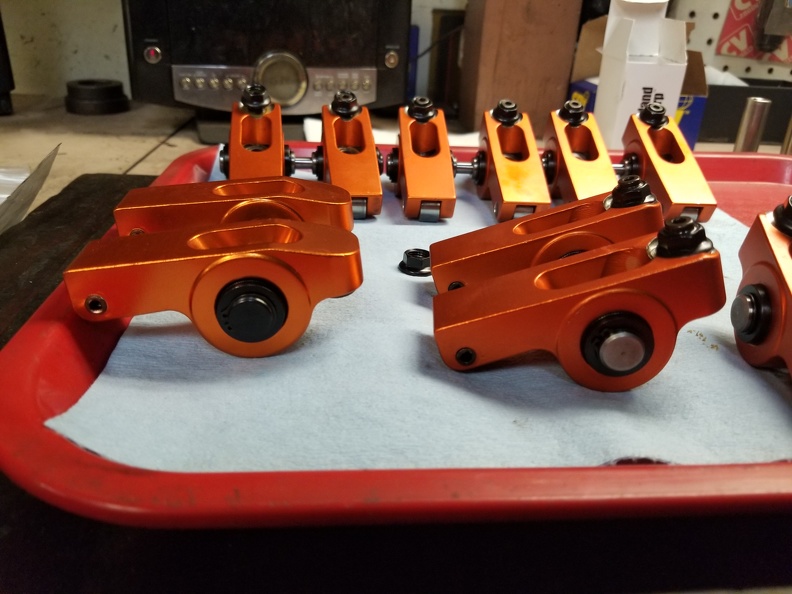
You'll notice with the profile change they will fit discreetly under a stock valve cover, too.
We got the 9.650 push rods in. At the last minute I decided to sell a friend the 1.6 adjustable roller rockers for his build and switch over to the 1.65:1 ratio fixed roller rockers. I get just a little more cam out of it and don't have to worry about adjusters.
You'll notice with the profile change they will fit discreetly under a stock valve cover, too.
-
cal
- Making Progress
- Posts: 61
- Joined: March 19th, 2008, 12:09 pm
- Stroker Displacement: 4.71
Re: A little 4.7 for the DD.
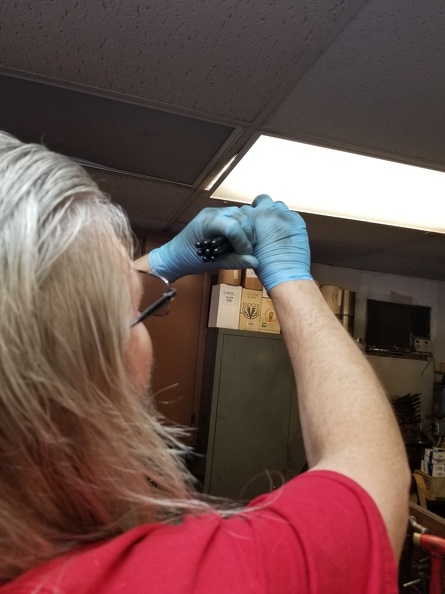
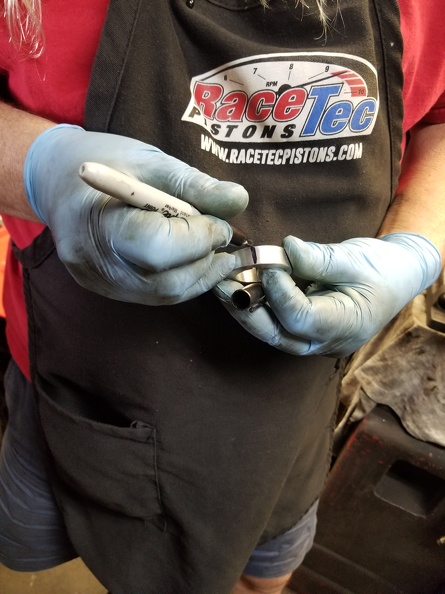
Before installing, Russ looks through each push rod to make sure they aren't blocked. Every now and then you get a little grease or a metal chip in one he says, 1-2 times a year, but enough to destroy a pushrod if you don't catch it.
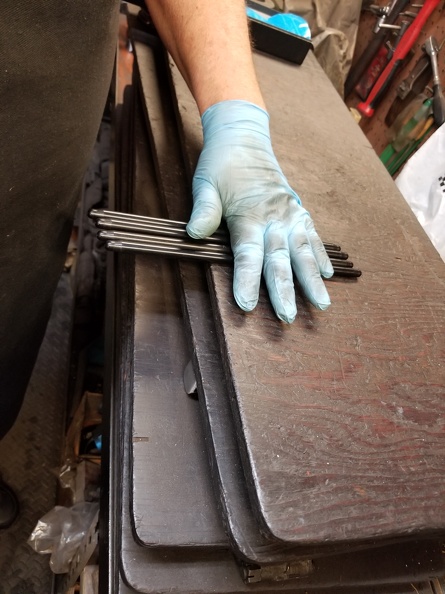
Once they are all cleared he rolls them on a flat surface just to make sure they are all strait. They always are he says, but it only takes a moment to check.
They go in with yet a different assembly lube. If you're keeping score, he has used 6 on this motor so far.
Drop them all in place.
LOTS of lube.
AAAAND yet a different lube on the top of the valves.
Back to the peanut butter, because no studs.
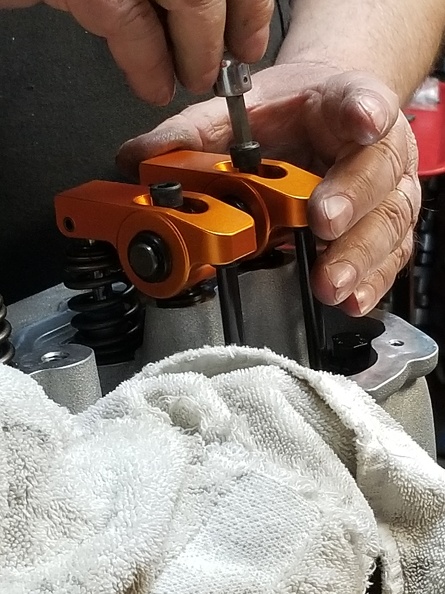
Set the first couple of rockers in
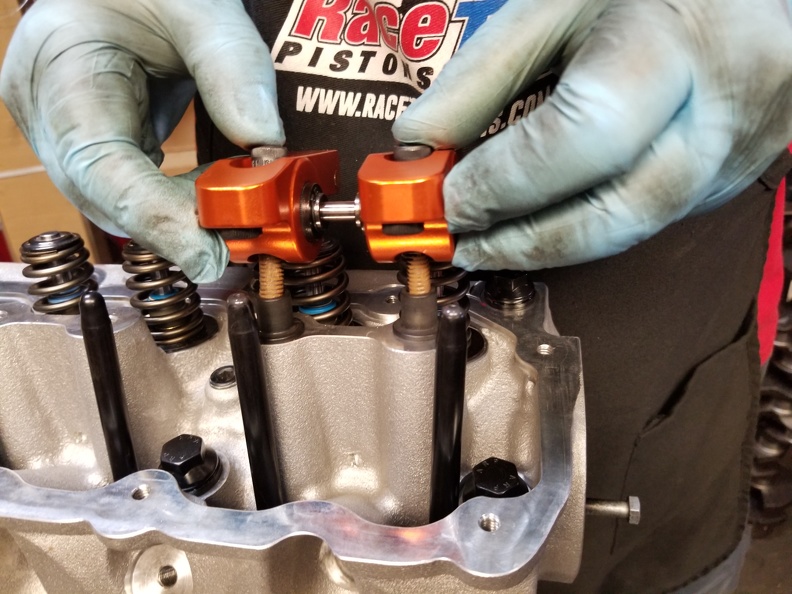
Then tighten them down
He twists the pushrod as he tightens the bolt down. He wants to feel the pushrod start to engage 1/4 to 3/4 of a turn away from the lifter bolt tightening up, to set preload on the lifter.
Halfway there.
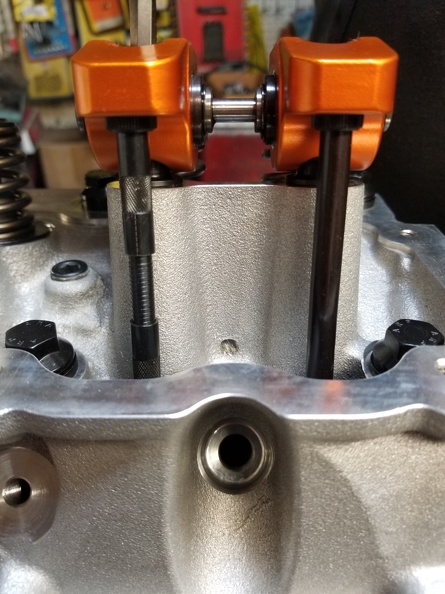
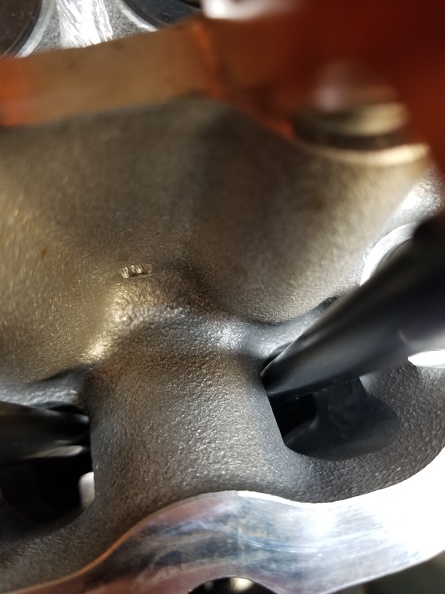
Russ says with the way the head is built the 3 and 4 pushrods get really close to the head, so he wants to inspect and make sure they aren't rubbing. If they are we'd have to clearance the head or go down to a 5/16 pushrod.
They are close, but they don't touch. This is as close as they get.
And then he does the rest (I didn't snap a photo)
Once they are all cleared he rolls them on a flat surface just to make sure they are all strait. They always are he says, but it only takes a moment to check.
They go in with yet a different assembly lube. If you're keeping score, he has used 6 on this motor so far.
Drop them all in place.
LOTS of lube.
AAAAND yet a different lube on the top of the valves.
Back to the peanut butter, because no studs.
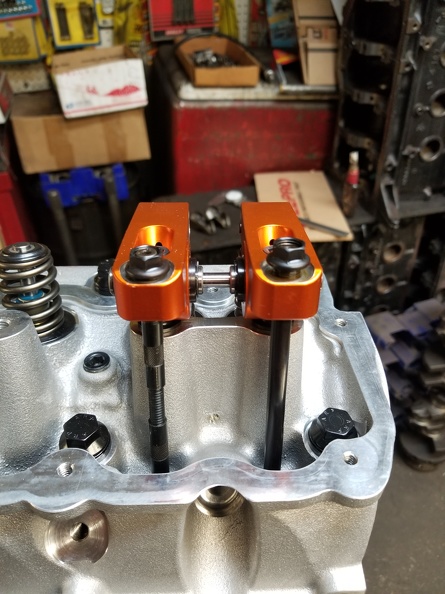
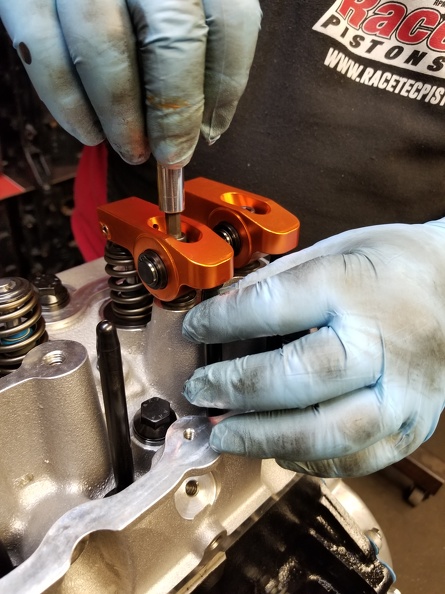
Set the first couple of rockers in
Then tighten them down
He twists the pushrod as he tightens the bolt down. He wants to feel the pushrod start to engage 1/4 to 3/4 of a turn away from the lifter bolt tightening up, to set preload on the lifter.
Halfway there.
Russ says with the way the head is built the 3 and 4 pushrods get really close to the head, so he wants to inspect and make sure they aren't rubbing. If they are we'd have to clearance the head or go down to a 5/16 pushrod.
They are close, but they don't touch. This is as close as they get.
And then he does the rest (I didn't snap a photo)
-
cal
- Making Progress
- Posts: 61
- Joined: March 19th, 2008, 12:09 pm
- Stroker Displacement: 4.71
Re: A little 4.7 for the DD.
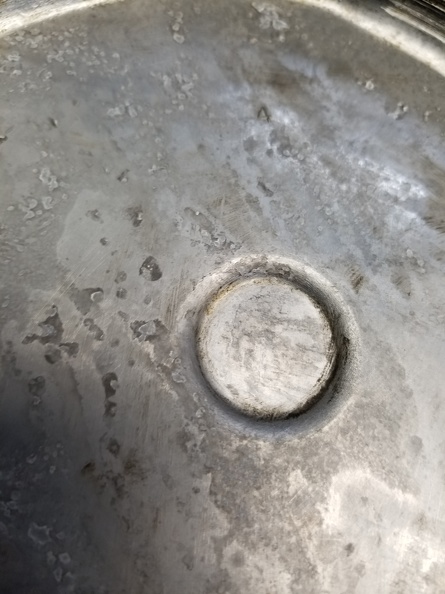
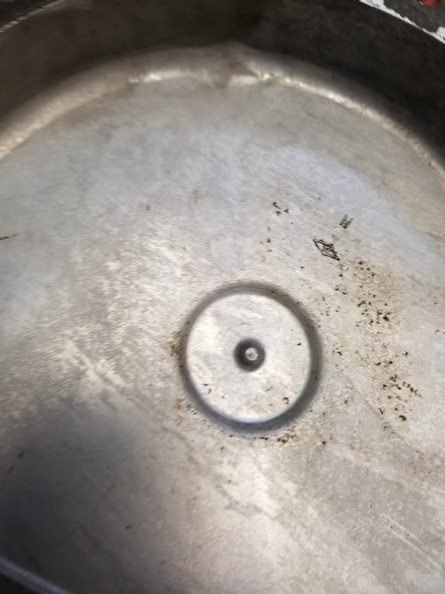
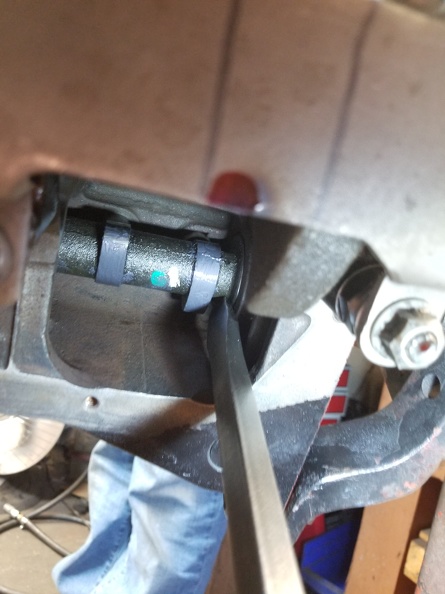
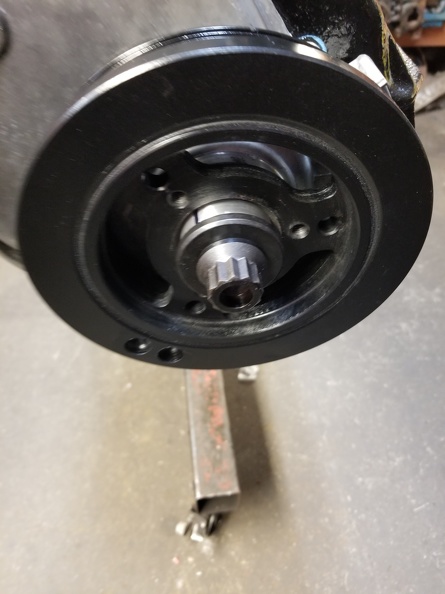
Now the harmonic goes on. Even though he honed it, its still a very tight fit. He says he hones a couple thousands off because they often are TOO tight, and will go on binding and popping their way down the crank galling it up.
It went this far with a rubber mallet.
And from here it requires the installer.
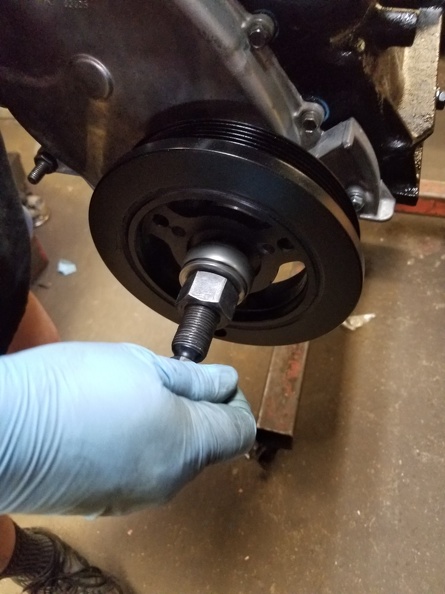
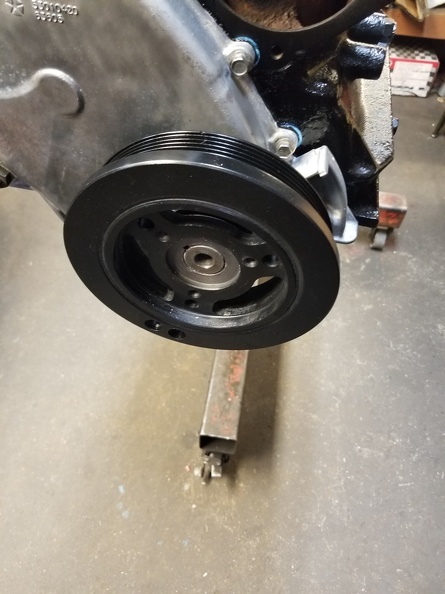
That's as far as it can go without putting a spacer in to keep pushing it.
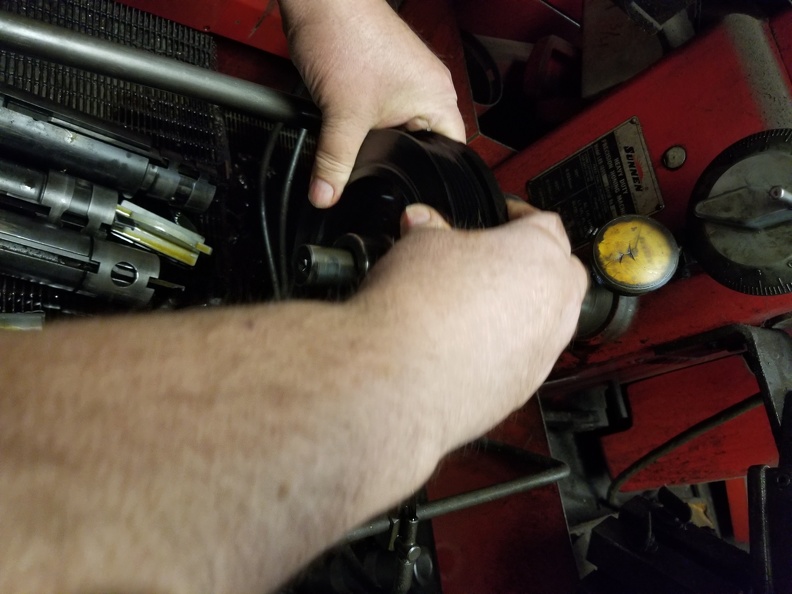
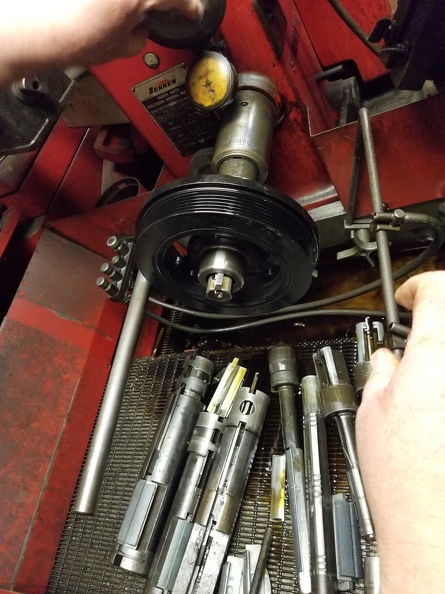
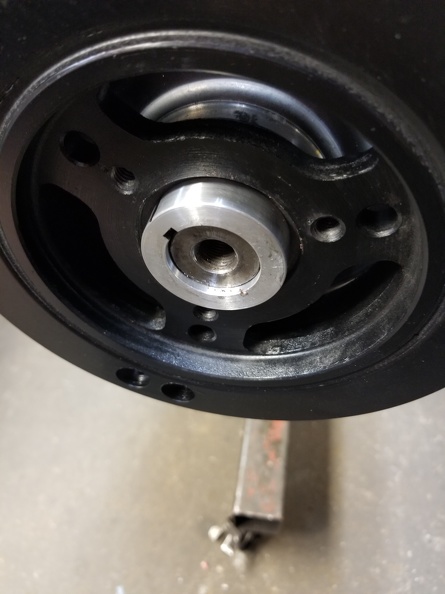
Marking the keyway on the spacer for orientation later.
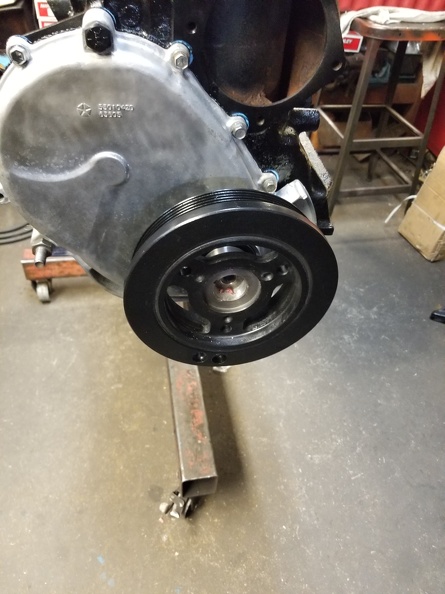
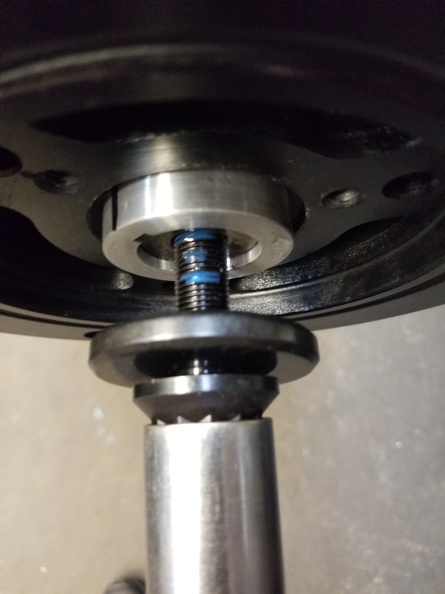
After putting the tool back on and pressing it all the way down. This is bottomed out, and shows why the spacer is required to bottom the bolt out.
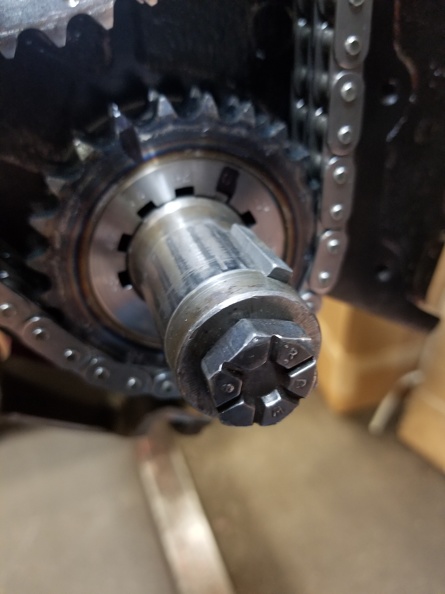
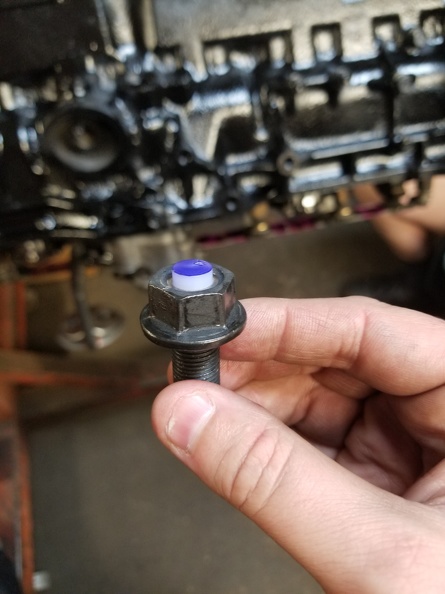
For purely GLOMy reasons, I bought an ARP 12 point crank bolt. Its for a big block chevy but also fits our cars.

Just a touch of blue locktite and crank it down.
It went this far with a rubber mallet.
And from here it requires the installer.
That's as far as it can go without putting a spacer in to keep pushing it.
Marking the keyway on the spacer for orientation later.
After putting the tool back on and pressing it all the way down. This is bottomed out, and shows why the spacer is required to bottom the bolt out.
For purely GLOMy reasons, I bought an ARP 12 point crank bolt. Its for a big block chevy but also fits our cars.
Just a touch of blue locktite and crank it down.
Who is online
Users browsing this forum: No registered users and 1 guest